

Class: Senior Secondary School 2 (SS2 / SSS2)
Term: Second Term
Week: 11
Age: 16 years
Duration: 45 minutes
Subject: Basic Electronics
Curriculum Theme: Basic Electronics
Previous Lesson: Radio Transmission and Reception: Block Diagram of Stages of a TV Receiver.
Topic: HAND TOOLS
Subject Matter: Meaning of hand tools, types and uses of hand tools (soldering iron, nose-plier, side-cutter, electrician knife, brushes, screw-drivers).
Specific Objectives
By the end of the lesson, pupils should be able to:
Cognitive Domain:
- Define hand tools.
- Identify various types of hand tools used in electronics.
- State the uses of different hand tools.
Affective Domain:
- Appreciate the importance of using appropriate tools for specific tasks.
- Recognize the need for safety precautions when handling hand tools.
Psychomotor Domain:
- Demonstrate the correct and safe handling of common hand tools.
- Select the appropriate hand tool for a given task.
Social Domain:
- Participate actively in class discussions about hand tools.
Reference Materials
The following resources were used in planning this lesson:
- Senior Secondary Schools Education Curriculum
- State Unified Scheme of Work
- Basic Electronics for Senior Secondary Schools, Book 2
- https://www.electricaltechnology.org/2020/07/types-of-electrical-hand-tools.html
- https://www.fluke.com/en-us/learn/blog/electrical/electrician-tools
Instructional Materials
The teacher will teach this lesson with the aid of:
- Various hand tools such as soldering iron, nose pliers, side cutters, electrician knife, brushes, and screwdrivers.
- Charts showing different hand tools and their applications.
Rationale for the Lesson
This lesson enables pupils to understand the essential tools used in basic electronics. Knowing about hand tools and their proper use is important for safely and effectively performing practical tasks and repairs in electronics.
Prerequisite/Previous Knowledge
Pupils have a basic understanding of simple electrical components and the need for precision in handling them.
Lesson Content/Board Summary
HAND TOOLS
Meaning of Hand Tools
Hand tools are devices that are operated manually, without the use of electric motors or other power sources. They are essential for various tasks in electronics, allowing for precision, assembly, and repair.
Types and Uses of Hand Tools
The following are common hand tools used in electronics and their uses:
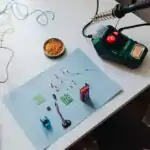
- Soldering Iron: Used to melt solder for joining electronic components onto circuit boards or wires.
- Nose Pliers (Long-nose Pliers): Used for gripping, bending, and forming small wires and components in tight spaces.
- Side Cutters (Diagonal Cutters): Used for cutting wires, component leads, and other small materials.
- Electrician Knife: Used for stripping insulation from wires, cleaning wire ends, and general-purpose cutting in electrical work.
- Brushes: Used for cleaning dust and debris from circuit boards and electronic components.
- Screwdrivers: Used for tightening and loosening screws, which are common fasteners in electronic devices and enclosures. They come in various tip types like Phillips, flat-head, and Torx.
- Wire Strippers: Used for removing the insulating covering from electrical wires without damaging the conductor.
- Tweezers: Used for handling small components, especially in surface-mount technology (SMT) or intricate assembly.
Teaching Methods/Instructional Techniques
Discussion, Lecture, Demonstration, Question and Answer, Visual Aids
Instructional Procedures
Step 1: Introduction
Time: 5 minutes
Teaching Skill: Set Induction
Teacher’s Activity: The teacher greets the pupils, reviews the previous lesson briefly, and then introduces the new topic, “Hand Tools,” by asking pupils to name some tools they know.
Pupils’ Activity: Pupils respond to the teacher’s questions and listen attentively.
Learning Point: Pupils are prepared for the new lesson and connect it to their existing knowledge.
Step 2: Definition of Hand Tools
Time: 8 minutes
Teaching Skill: Explanation/Definition
Teacher’s Activity: The teacher defines hand tools, explaining that they are manually operated devices essential for electronic work. The teacher writes the definition on the board.
Pupils’ Activity: Pupils listen, participate in the discussion, and copy the definition into their notebooks.
Learning Point: Pupils understand the meaning of hand tools.
Step 3: Identification of Hand Tools
Time: 8 minutes
Teaching Skill: Identification/Demonstration
Teacher’s Activity: The teacher presents various hand tools (e.g., soldering iron, nose pliers, side cutters) and asks pupils to identify them. The teacher writes the names of the tools on the board.
Pupils’ Activity: Pupils identify the tools and observe their physical characteristics.
Learning Point: Pupils can identify common hand tools used in electronics.
Step 4: Uses of Soldering Iron and Nose Pliers
Time: 8 minutes
Teaching Skill: Demonstration/Explanation
Teacher’s Activity: The teacher explains and demonstrates the specific uses of the soldering iron and nose pliers, emphasizing proper handling and safety. The uses are noted on the board.
Pupils’ Activity: Pupils observe the demonstration, ask questions, and take notes on the uses of the tools.
Learning Point: Pupils understand the function and safe handling of a soldering iron and nose pliers.
Step 5: Uses of Side Cutter, Electrician Knife, Brushes, and Screwdrivers
Time: 8 minutes
Teaching Skill: Demonstration/Explanation
Teacher’s Activity: The teacher continues to explain and demonstrate the uses of side cutters, electrician knives, brushes, and different types of screwdrivers. The teacher encourages pupils to practice safe handling.
Pupils’ Activity: Pupils pay attention to the demonstrations, ask clarifying questions, and record the uses of these tools.
Learning Point: Pupils learn the functions and safe operation of additional hand tools.
Step 6: Safety in Using Hand Tools
Time: 3 minutes
Teaching Skill: Emphasizing/Instruction
Teacher’s Activity: The teacher discusses general safety precautions when using any hand tool, such as keeping tools clean, using the right tool for the job, and storing them properly.
Pupils’ Activity: Pupils listen and contribute to the discussion on safety.
Learning Point: Pupils understand the importance of safety when working with hand tools.
Step 7: Evaluation/Review
Time: 5 minutes
Teaching Skill: Questioning/Assessment
Teacher’s Activity: The teacher evaluates the learning by asking the following questions:
- What are hand tools?
- Mention three types of hand tools used in electronics.
- State one use for a soldering iron and one for nose pliers.
- Why is it important to use the correct hand tool for a task?
Pupils’ Activity: Pupils answer orally and in writing.
Learning Point: Pupils demonstrate understanding of the lesson.
Step 8: Conclusion
Time: 3 minutes
Teaching Skill: Summarizing/Assignment
Teacher’s Activity: The teacher summarizes the key points of the lesson on hand tools and their uses. The teacher gives pupils an assignment to draw and label five hand tools with their uses.
Pupils’ Activity: Pupils listen to the summary and copy the assignment.
Learning Point: The lesson is reinforced, and pupils are given a task to consolidate their learning.
Lesson Keywords
- Hand tools – Manually operated devices for electronic work.
- Soldering iron – Used for joining components with solder.
- Nose pliers – Used for gripping and bending small wires.
- Side cutter – Used for cutting wires.
- Electrician knife – Used for stripping wires and general cutting.
- Brushes – Used for cleaning electronic components.
- Screwdrivers – Used for tightening and loosening screws.
Differentiation
For struggling learners, the teacher will provide simplified diagrams and offer more direct guidance during practical identification and demonstration. Advanced learners will be encouraged to research additional specialized hand tools and their applications in electronics.
Note for teachers using this lesson plan
Teachers should ensure that actual hand tools are available for pupils to see and, where appropriate, handle under supervision. Emphasize safety throughout the lesson, especially when demonstrating tools like soldering irons and cutters. Encourage pupils to ask questions to clarify their understanding of each tool’s function.

Community Join the conversation Open discussion +