

Class: Senior Secondary School 2 (SS2 / SSS2)
Term: Second Term
Week: 8
Age: 16 years
Duration: 45 minutes
Subject: Auto Mechanic Work
Curriculum Theme: Automotive Systems and Maintenance
Previous Lesson: Carburettors—Simple and Multi-Jet Caburettors: Operation Sketches.
Topic: CARBURETTORS— REMOVE AND REPLACE CARBURETTORS.
Subject Matter: Meaning of CARBURETTORS— REMOVE AND REPLACE CARBURETTORS (definition of carburettor servicing), diagnosis of faults in carburetors (common symptoms, fault points), simple carburetor maintenance (cleaning, adjustment).
Specific Objectives
By the end of the lesson, pupils should be able to:
Cognitive Domain:
- Define carburettor servicing.
- Identify common symptoms of carburettor faults.
- State the basic steps for carburettor removal and replacement.
Affective Domain:
- Appreciate the importance of regular carburettor maintenance for engine performance.
- Develop a safety-conscious attitude when working on vehicle engines.
- Show willingness to follow proper procedures for carburettor servicing.
Psychomotor Domain:
- Diagnose simple faults in a carburettor.
- Perform basic cleaning and adjustment of a carburettor.
- Demonstrate the safe removal and replacement of a carburettor.
Social Domain:
- Work collaboratively with peers during practical demonstrations and activities.
- Communicate observations and findings effectively during fault diagnosis.
Reference Materials
The following resources were used in planning this lesson:
- Senior Secondary Schools Education Curriculum
- State Unified Scheme of Work
- Auto Mechanic Work for Senior Secondary Schools, Textbook 2
Instructional Materials
The teacher will teach this lesson with the aid of:
- Live vehicle
- Assorted spanners
- Hammers
- Posters illustrating carburettor components
- Charts showing carburettor fault diagnosis flowcharts
- Carburettor cleaner
- Compressed air gun
Rationale for the Lesson
This lesson helps pupils understand how carburettors work and how to keep them in good condition. Learning carburettor servicing enables pupils to diagnose and fix common engine problems, which is important for vehicle maintenance and their future careers in automotive repair.
Prerequisite/Previous Knowledge
Pupils should have basic knowledge of internal combustion engines, their main components, and the function of the fuel system.
Lesson Content/Board Summary
Carburettors: Remove and Replace
Definition of Carburettor Servicing
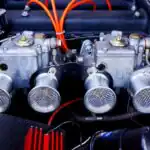
Carburettor servicing involves the inspection, cleaning, adjustment, and repair or replacement of parts of a carburettor to ensure it functions correctly. This helps in maintaining proper air-fuel mixture for efficient engine operation.
Diagnosis of Faults in Carburettors
Fault diagnosis is the process of identifying problems within the carburettor system. This involves observing symptoms and checking specific fault points.
The following are common symptoms of carburettor faults:
- Hard Starting: Difficulty in getting the engine to start, especially when cold.
- Rough Idling: Engine runs unevenly or stalls when idling.
- Poor Acceleration: Engine hesitates or lacks power when the accelerator pedal is pressed.
- Excessive Fuel Consumption: Engine uses more fuel than normal.
- Black Smoke from Exhaust: Indicates an overly rich fuel mixture.
- Engine Misfiring: Irregular combustion in cylinders.
- Fuel Leaks: Visible fuel dripping from the carburettor.
The following are common fault points in carburetors:
- Clogged Jets: Restricted fuel flow due to dirt or debris.
- Faulty Float: Incorrect fuel level in the float bowl, leading to rich or lean mixtures.
- Worn Throttle Shaft: Allows air leaks, causing rough idling.
- Vacuum Leaks: Cracks in vacuum hoses or gaskets, affecting air-fuel mixture.
- Stuck Choke Valve: Prevents proper cold starting or causes rich running.
- Damaged Gaskets/Seals: Leads to fuel or vacuum leaks.
Simple Carburettor Maintenance
Regular maintenance helps prevent major carburettor problems and ensures optimal engine performance.
- Cleaning:
- Use a carburettor cleaner spray to remove varnish, carbon deposits, and dirt from internal passages and external surfaces.
- Use compressed air to blow out jets, passages, and air bleeds after spraying cleaner.
- Inspect and clean the air filter regularly to ensure clean air supply.
- Adjustment:
- Idle Speed Adjustment: Adjust the idle speed screw to achieve the manufacturer’s recommended engine RPM at idle.
- Mixture Screw Adjustment: Adjust the air-fuel mixture screw to achieve the smoothest idle and best engine response. This often requires careful turning and listening to engine sound.
Procedure for Removing a Carburettor
Follow these steps carefully to remove a carburettor:
- Step 1: Disconnect Battery: Disconnect the negative terminal of the vehicle battery to prevent electrical hazards.
- Step 2: Relieve Fuel Pressure (if applicable): For some systems, it might be necessary to relieve fuel pressure.
- Step 3: Disconnect Fuel Lines: Carefully disconnect the fuel inlet line and return line (if present). Be prepared for minor fuel spills.
- Step 4: Disconnect Vacuum Hoses: Label and disconnect all vacuum lines connected to the carburettor.
- Step 5: Disconnect Linkages: Disconnect the throttle cable and choke linkage (manual or automatic).
- Step 6: Remove Air Cleaner Assembly: Unbolt and remove the air cleaner housing and filter.
- Step 7: Unbolt Carburettor: Loosen and remove the mounting nuts or bolts that secure the carburettor to the intake manifold.
- Step 8: Lift Carburettor: Carefully lift the carburettor off the intake manifold, ensuring no small parts fall into the manifold. Remove the old gasket.
Procedure for Replacing a Carburettor
Follow these steps to install a carburettor:
- Step 1: Clean Mounting Surface: Ensure the intake manifold mounting surface is clean and free of old gasket material.
- Step 2: Install New Gasket: Place a new carburettor base gasket onto the intake manifold.
- Step 3: Position Carburettor: Carefully lower the carburettor onto the new gasket, aligning it with the mounting studs/holes.
- Step 4: Secure Carburettor: Install and hand-tighten the mounting nuts or bolts. Then, tighten them evenly in a cross-pattern to the manufacturer’s specified torque.
- Step 5: Reconnect Linkages: Reconnect the throttle cable and choke linkage. Check for smooth operation.
- Step 6: Reconnect Vacuum Hoses: Reconnect all vacuum lines to their correct ports using the labels made during removal.
- Step 7: Reconnect Fuel Lines: Reconnect the fuel inlet and return lines securely.
- Step 8: Install Air Cleaner Assembly: Reinstall the air cleaner housing and filter.
- Step 9: Reconnect Battery: Reconnect the negative terminal of the battery.
- Step 10: Check for Leaks and Test: Start the engine, check for fuel leaks, and test engine operation. Make any necessary adjustments (idle speed, mixture).
Teaching Methods/Instructional Techniques
Discussion, Lecture, Demonstration, Question and Answer, Visual Aids
Instructional Procedures
Step 1: Introduction
Time: 5 minutes
Teaching Skill: Set Induction
Teacher’s Activity: The teacher greets the pupils and asks them to recall the previous lesson on the fuel system. The teacher then introduces the topic of carburettors and their importance in an engine.
Pupils’ Activity: Pupils respond to the teacher’s questions and listen attentively to the introduction.
Learning Point: Pupils recall prior knowledge and are introduced to the new topic.
Step 2: Meaning of Carburettor Servicing
Time: 7 minutes
Teaching Skill: Explanation/Definition
Teacher’s Activity: The teacher explains the meaning of carburettor servicing, emphasizing its role in maintaining engine efficiency and performance. The teacher uses the board summary for key points.
Pupils’ Activity: Pupils listen, take notes, and ask questions for clarification.
Learning Point: Pupils understand the definition and purpose of carburettor servicing.
Step 3: Diagnosis of Carburettor Faults
Time: 8 minutes
Teaching Skill: Discussion/Analysis
Teacher’s Activity: The teacher leads a discussion on common symptoms of carburettor faults and identifies typical fault points using charts and posters. The teacher encourages pupils to share their experiences.
Pupils’ Activity: Pupils identify symptoms, discuss possible causes, and take notes from the board summary.
Learning Point: Pupils learn to diagnose common carburettor problems based on symptoms and fault points.
Step 4: Simple Carburettor Maintenance
Time: 7 minutes
Teaching Skill: Demonstration/Practical
Teacher’s Activity: Using a carburettor (or a live vehicle if available), the teacher demonstrates simple maintenance procedures such as cleaning with spray cleaner and compressed air, and basic adjustments like idle speed and mixture.
Pupils’ Activity: Pupils observe the demonstration carefully and ask questions about the procedures.
Learning Point: Pupils understand and observe the practical steps for simple carburettor maintenance.
Step 5: Demonstration of Carburettor Removal
Time: 6 minutes
Teaching Skill: Demonstration/Practical
Teacher’s Activity: The teacher demonstrates the step-by-step process of safely removing a carburettor from the live vehicle, highlighting safety precautions and proper tool usage.
Pupils’ Activity: Pupils pay close attention to each step of the removal process and note the sequence.
Learning Point: Pupils learn the correct and safe procedure for carburettor removal.
Step 6: Demonstration of Carburettor Replacement
Time: 6 minutes
Teaching Skill: Demonstration/Practical
Teacher’s Activity: The teacher demonstrates the step-by-step process of replacing the carburettor, emphasizing the importance of new gaskets, proper tightening, and reconnecting all components correctly.
Pupils’ Activity: Pupils observe the replacement process, noting the reverse order of steps and key considerations.
Learning Point: Pupils learn the correct and safe procedure for carburettor replacement.
Step 7: Evaluation/Review
Time: 5 minutes
Teaching Skill: Questioning/Assessment
Teacher’s Activity: The teacher evaluates the learning by asking the following questions:
- Define carburettor servicing.
- Mention three common symptoms of a faulty carburettor.
- List two simple maintenance procedures for a carburettor.
- State any three steps involved in removing a carburettor.
Pupils’ Activity: Pupils answer orally and in writing.
Learning Point: Pupils demonstrate understanding of the lesson.
Step 8: Conclusion
Time: 1 minute
Teaching Skill: Summarization
Teacher’s Activity: The teacher summarizes the key points of the lesson and assigns homework, which could include sketching a carburettor or researching different types of carburettors.
Pupils’ Activity: Pupils listen to the summary and copy down the homework.
Learning Point: The lesson is concluded, and pupils are given further tasks.
Lesson Keywords
- Carburettor – A device in an internal combustion engine for mixing air with a fine spray of liquid fuel.
- Servicing – The process of inspecting, maintaining, and repairing a component or system.
- Diagnosis – The identification of the nature and cause of a problem.
- Maintenance – The process of preserving a component or system in good condition.
- Jets – Small, precisely sized orifices in a carburettor that control fuel flow.
- Float – A buoyant device in the carburettor’s fuel bowl that regulates fuel level.
Differentiation
For pupils who grasp concepts quickly, the teacher can challenge them to identify specific carburettor types or research advanced troubleshooting techniques. For those who need more support, the teacher will provide additional one-on-one guidance during practical sessions and simplify explanations using visual aids.
Note for teachers using this lesson plan
Ensure all safety precautions are strictly followed during practical demonstrations, especially when working with fuel and tools. Emphasize the importance of proper labeling of hoses and linkages during removal to ensure correct reassembly. Encourage hands-on practice under close supervision to build pupils’ confidence and practical skills.

Community Join the conversation Open discussion +