

Class: Senior Secondary School 2 (SS2 / SSS 2)
Term: 3rd Term
Week: 3
Age: 16 years
Duration: 45 minutes
Subject: Auto Mechanic Work
Curriculum Theme: Vehicle Maintenance and Repair
Previous Lesson: Braking System—Master Cylinder Operations: Draw and Assess Function.
Topic: BRAKING SYSTEM– ADJUSTMENTS OF BRAKES
Subject Matter: Meaning of BRAKING SYSTEM– ADJUSTMENTS OF BRAKES (definition of brake adjustment), remove and replace brake component parts (procedure), simple brake adjustment on a hydraulic operation (setting, testing).
Specific Objectives
By the end of the lesson, pupils should be able to:
Cognitive Domain:
- Define brake adjustment.
- State the steps involved in removing and replacing brake component parts.
- Explain the process of a simple brake adjustment on a hydraulic operation.
Affective Domain:
- Appreciate the importance of proper brake adjustment for vehicle safety.
- Demonstrate care and attention while working with brake systems.
- Show interest in learning practical auto mechanic skills.
Psychomotor Domain:
- Safely remove and replace common brake component parts.
- Perform a simple brake adjustment on a hydraulic braking system.
- Use appropriate tools and equipment for brake maintenance.
Social Domain:
- Work cooperatively with peers during practical demonstrations.
- Adhere to safety guidelines when handling vehicle components.
- Communicate observations and findings clearly.
Reference Materials
The following resources were used in planning this lesson:
- Senior Secondary Schools Education Curriculum
- State Unified Scheme of Work
- Auto Mechanics for Senior Secondary Schools by A.O. Okoro
Instructional Materials
The teacher will teach this lesson with the aid of:
- Live vehicle with a hydraulic braking system
- Assorted hand tools (wrenches, screwdrivers, pliers)
- Jack and jack stands
- Brake fluid
- Charts and posters illustrating braking system components and adjustment points
- Safety goggles and gloves
Rationale for the Lesson
This lesson helps pupils understand the importance of maintaining a vehicle’s braking system. It provides essential knowledge and practical skills for ensuring vehicle safety, which is important for both personal use and professional careers in auto mechanics.
Prerequisite/Previous Knowledge
Pupils should have basic knowledge of vehicle components, the general function of a braking system, and common safety practices in a workshop environment.
Lesson Content/Board Summary
BRAKING SYSTEM – ADJUSTMENTS OF BRAKES
Meaning of Brake Adjustment
Brake adjustment refers to the process of setting the brake system components to ensure proper operation, effective stopping power, and even wear of brake pads or shoes. This often involves adjusting the clearance between the friction material and the drum or disc, or ensuring proper fluid levels and pressure in hydraulic systems.
Procedure for Removing and Replacing Brake Component Parts (e.g., Brake Pads/Shoes)
The following are general steps for removing and replacing brake components:
- Step 1: Preparation and Safety – Park the vehicle on a level surface, engage the parking brake, and loosen lug nuts. Use a jack to lift the vehicle and secure it with jack stands.
- Step 2: Wheel Removal – Remove the lug nuts completely and take off the wheel.
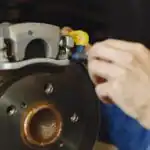
- Step 3: Accessing Brake Components – Depending on the brake type (disc or drum), remove necessary retaining clips, bolts, or springs to access the brake pads or shoes. For disc brakes, this usually involves unbolting the caliper.
- Step 4: Component Removal – Carefully remove the old brake pads or shoes. Note their orientation.
- Step 5: Inspection and Cleaning – Inspect other brake components (rotor, drum, caliper, lines) for wear or damage. Clean any accumulated dust or debris.
- Step 6: Installation of New Components – Install the new brake pads or shoes in the correct orientation. For disc brakes, compress the caliper piston if necessary (using a C-clamp or specialized tool) to make space for the thicker new pads.
- Step 7: Reassembly – Reassemble all retaining clips, bolts, and springs. Ensure all components are securely fastened.
- Step 8: Wheel Reinstallation – Mount the wheel back onto the hub, hand-tighten lug nuts, lower the vehicle, and then fully tighten the lug nuts in a star pattern.
- Step 9: Brake System Check – Pump the brake pedal several times to seat the new pads/shoes and build pressure. Check brake fluid level and top up if necessary. Test the brakes in a safe area at low speed.
Simple Brake Adjustment on a Hydraulic Operation (Setting and Testing)
Hydraulic brake systems, particularly disc brakes, are largely self-adjusting as pads wear. However, manual adjustment may be needed for parking brakes or older drum brake systems.
For Parking Brake Adjustment (often cable-operated, but linked to hydraulic system):
- Setting:
- Locate the parking brake adjustment nut (often found under the vehicle, near the parking brake lever, or at the rear brake assembly).
- Loosen the lock nut and then tighten the adjustment nut until there is a slight drag on the rear wheels when the parking brake is released, or until the parking brake lever engages within the specified number of clicks (e.g., 3-5 clicks).
- Tighten the lock nut.
- Testing:
- With the parking brake released, spin the rear wheels to ensure they rotate freely without excessive drag.
- Engage the parking brake and try to spin the wheels; they should be firmly locked.
- Test the parking brake on a slight incline to ensure it holds the vehicle securely.
Teaching Methods/Instructional Techniques
Discussion, Lecture, Demonstration, Question and Answer, Visual Aids
Instructional Procedures
Step 1: Introduction
Time: 5 minutes
Teaching Skill: Set Induction
Teacher’s Activity: The teacher asks pupils about the importance of brakes in a vehicle and what they know about maintaining them.
Pupils’ Activity: Pupils share their ideas and prior knowledge about vehicle brakes.
Learning Point: Pupils recall previous knowledge and are introduced to the lesson topic.
Step 2: Meaning of Brake Adjustment
Time: 7 minutes
Teaching Skill: Explanation/Definition
Teacher’s Activity: The teacher defines brake adjustment and explains why it is necessary for vehicle safety and performance, using charts.
Pupils’ Activity: Pupils listen attentively, ask questions for clarification, and take notes.
Learning Point: Pupils understand the definition and importance of brake adjustment.
Step 3: Removing Brake Component Parts
Time: 8 minutes
Teaching Skill: Demonstration/Practical
Teacher’s Activity: The teacher demonstrates the safe procedure for removing brake component parts (e.g., wheel, caliper, brake pads) on the live vehicle, emphasizing safety precautions.
Pupils’ Activity: Pupils observe the demonstration carefully and note the steps and safety measures.
Learning Point: Pupils learn the practical steps for safely disassembling brake components.
Step 4: Replacing Brake Component Parts
Time: 8 minutes
Teaching Skill: Demonstration/Practical
Teacher’s Activity: The teacher continues the demonstration by showing how to correctly replace the brake component parts, ensuring all fasteners are secured.
Pupils’ Activity: Pupils pay close attention to the reassembly process and proper torque application.
Learning Point: Pupils understand the correct procedure for reassembling brake components.
Step 5: Simple Brake Adjustment on a Hydraulic Operation
Time: 7 minutes
Teaching Skill: Guided Practice
Teacher’s Activity: The teacher guides pupils through a simple brake adjustment on the hydraulic system (e.g., parking brake adjustment), explaining the setting and testing process.
Pupils’ Activity: Pupils, under supervision, observe and practice the adjustment steps on the live vehicle.
Learning Point: Pupils gain practical experience in performing a simple brake adjustment.
Step 6: Safety Precautions and Tools
Time: 5 minutes
Teaching Skill: Reinforcement/Discussion
Teacher’s Activity: The teacher reviews essential safety precautions and the correct use of tools specific to brake work.
Pupils’ Activity: Pupils discuss safety points and identify the correct tools for different tasks.
Learning Point: Pupils reinforce their understanding of workshop safety and tool usage.
Step 7: Evaluation/Review
Time: 5 minutes
Teaching Skill: Questioning/Assessment
Teacher’s Activity: The teacher evaluates the learning by asking the following questions:
- What is brake adjustment?
- Mention three steps involved in removing a vehicle wheel to access brake components.
- List two safety precautions to observe when working on a vehicle’s braking system.
- Describe how you would test a parking brake after adjustment.
Pupils’ Activity: Pupils answer orally and in writing.
Learning Point: Pupils demonstrate understanding of the lesson.
Step 8: Conclusion
Time: 2 minutes
Teaching Skill: Summarization
Teacher’s Activity: The teacher summarizes the key points of the lesson, emphasizing the importance of proper brake maintenance for road safety.
Pupils’ Activity: Pupils listen and ask any final questions.
Learning Point: Pupils consolidate their learning and understand the practical relevance of the topic.
Lesson Keywords
- Brake Adjustment – The process of setting brake components for optimal performance and safety.
- Hydraulic Brake – A braking system that uses fluid pressure to transmit force from the pedal to the brake mechanism.
- Brake Pad – Friction material that presses against the brake disc to slow down the vehicle.
- Brake Caliper – The assembly that houses the brake pads and pistons in a disc brake system.
- Jack Stand – A safety device used to support a raised vehicle, preventing it from falling.
Differentiation
For pupils who grasp concepts quickly, the teacher can assign additional research on different types of braking systems (e.g., ABS, regenerative brakes). For those needing more support, the teacher will provide one-on-one guidance during practical sessions and use more visual aids and simplified explanations.
Note for teachers using this lesson plan
Safety is paramount in auto mechanic work. Ensure all practical demonstrations and pupil activities are conducted under strict supervision, with all necessary safety gear and precautions in place. Emphasize that brake work should only be performed by trained individuals. The practical components should be structured to allow maximum pupil participation while maintaining safety standards.


Community Join the conversation Open discussion +