

Note for teachers using this lesson plan
Before this lesson, gather real examples of simple machines like scissors, a bottle opener, and pictures of a slide or seesaw. The central idea is for pupils to understand that simple machines are tools that make work easier and to identify common examples. Observe pupils pointing to and naming these items as a sign of successful learning.
Class: Pre-School Level 2
Term: Third Term
Week: 2
Age: 3 years
Duration: 30 minutes
Subject: Pre-Science
Curriculum Theme: Pre-Science
Previous Lesson: Not separately stated in the scheme
Topic: SIMPLE MACHINES: MEANING AND IDENTIFICATION
Subject Matter: Simple Machines: Definition, Identification, and Uses.
Specific Objectives
By the end of the lesson, pupils should be able to:
Cognitive Domain
- State in simple terms what a simple machine is.
- Identify common simple machines like scissors, bottle openers, and slides.
- Name one use for a simple machine (e.g., scissors for cutting).
Affective Domain
- Listen attentively during explanations and demonstrations about simple machines.
- Show curiosity about how simple machines help people.
Psychomotor Domain
- Point to pictures or real examples of simple machines when asked.
- Demonstrate the simple action of using a scissor (pretend cutting) or a bottle opener (pretend opening).
Social Domain
- Participate in class discussions by sharing observations about simple machines they have seen.
Reference Materials
- NAPPS National Unified Teaching Scheme for Pre-School Level 2
- Suitable Early Childhood Care and Education resources
Instructional Materials
- Charts showing different simple machines (e.g., seesaw, slide, wheelbarrow, scissors, bottle opener)
- Real objects: a pair of child-safe scissors, a bottle opener (empty bottle for demonstration)
- Pictures of simple machines found at home and school
- Video clip on simple machines for children
Rationale for the Lesson
This lesson introduces 3-year-olds to the concept of simple machines, which are everyday tools that make tasks easier. Understanding these basic tools helps children observe their environment more closely and builds foundational knowledge for future science concepts, connecting what they learn to practical experiences at home and school.Prerequisite/Previous Knowledge
Pupils have seen and used various tools and objects in their daily lives at home and school, such as spoons, pencils, and toys with wheels.Lesson Content/Board Summary
SIMPLE MACHINES: MEANING AND IDENTIFICATION
What are Simple Machines?
Simple machines are special tools that help us do work more easily. They make our work not so hard! They can help us lift heavy things, move things, or cut things.
Examples of Simple Machines:
- Scissors: Helps us cut paper, fabric, or hair. (It has two parts that move together to cut.)
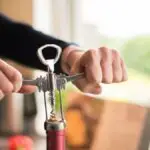
- Bottle Opener: Helps us open bottles easily. (It lifts the cap off.)
- Slide: Helps us go down quickly and easily at the playground. (It’s a sloping surface.)
- Seesaw: Helps us lift each other up and down for fun. (It’s a long bar that balances.)
- Wheel: Helps us move things, like on a bicycle or a car. (It rolls.)
Key Words
- Machine – a tool that helps us do work.
- Scissors – a tool for cutting.
- Opener – a tool for opening things.
Simple Machines Song
Tune: “Twinkle, Twinkle Little Star”
Simple machines, oh so grand,
Help us work across the land.
Scissors snip and bottle pop,
Make our hard work quickly stop.
Simple machines, oh so grand,
Help us work across the land.
Actions:
- “Simple machines, oh so grand” – open hands wide.
- “Help us work across the land” – make working motions with hands.
- “Scissors snip” – make cutting motion with fingers.
- “And bottle pop” – make a popping sound and motion.
- “Make our hard work quickly stop” – wipe forehead as if tired, then smile.
- Repeat actions for the last two lines.
Watch and Learn About Simple Machines
💡 Teacher Guide for Using This Board Summary
How to teach the content: Explain that simple machines are “helper tools” using very simple language. Show the charts and real objects, pointing to each and saying its name and what it helps us do. Emphasize that they make work “easier” or “not so hard.”
What to show or demonstrate: Hold up the scissors and demonstrate a cutting motion (without paper for safety). Hold up the bottle opener and show how it would lift a cap (using an empty bottle). Point to pictures of a slide and a seesaw, asking pupils if they have seen or used them.
How to use the rhyme/song: Sing the “Simple Machines Song” slowly, demonstrating the actions. Encourage pupils to join in with the actions and repeat the simple words. Sing it 2-3 times to reinforce the concept.
How to use the video: Introduce the video as a fun way to see more simple machines. Play the first 1:30 minutes of the video, focusing on the introduction and initial examples. Pause to ask pupils what they saw or what the machines helped to do. Encourage them to point to any simple machines they recognise in the video.
What to watch for: Observe if pupils can point to the correct simple machine when named and if they can repeat simple phrases like “scissors cut” or “opener opens.” Watch for any confusion between simple machines and other tools.
Teaching Methods/Instructional Techniques
- Play-based Learning
- Demonstration
- Guided Practice
- Songs and Rhymes
- Picture Talk
- Question and Answer
- Manipulation of Objects
- Repetition
Instructional Procedures
Step 1: Introduction
Time: 3 minutes
Teaching Skill: Engagement/Recall
Teacher’s Activity: The teacher greets pupils and starts with a simple warm-up question: “What are some things you use at home or school that help you do things, like cut paper or open a bottle?”
Pupils’ Activity: Pupils respond by naming familiar objects or actions (e.g., “scissors,” “knife,” “my hands”).
Learning Point: Pupils recall familiar tools and actions, preparing for the lesson.
Step 2: Explaining Simple Machines
Time: 5 minutes
Teaching Skill: Explanation/Concept Introduction
Teacher’s Activity: The teacher explains in simple terms: “Today, we will learn about ‘simple machines.’ Simple machines are special tools that help us do work easily! They make our work not so hard.” The teacher shows a chart with various simple machines.
Pupils’ Activity: Pupils listen attentively and look at the chart, pointing to pictures as the teacher names them.
Learning Point: Pupils understand the basic concept that simple machines make work easier.
Step 3: Identifying Simple Machines with Real Objects
Time: 5 minutes
Teaching Skill: Demonstration/Identification
Teacher’s Activity: The teacher brings out real objects (child-safe scissors, bottle opener). “Look, this is a scissor! It’s a simple machine. What does a scissor help us do? (Cut!) And this is a bottle opener. It’s also a simple machine. What does it help us do? (Open bottles!)” The teacher demonstrates the simple action of each.
Pupils’ Activity: Pupils observe the real objects, say their names, and repeat their uses. They might make pretend cutting or opening motions.
Learning Point: Pupils identify real-life examples of simple machines and their functions.
Step 4: Singing the Simple Machines Song
Time: 4 minutes
Teaching Skill: Reinforcement/Music Integration
Teacher’s Activity: The teacher introduces the “Simple Machines Song” and sings it with actions. “Let’s sing a song about these helper tools!” The teacher encourages pupils to join in with the singing and actions.
Pupils’ Activity: Pupils listen, sing along, and perform the actions for the song, reinforcing the concept of simple machines.
Learning Point: Pupils reinforce learning through song and movement, aiding memory.
Step 5: Watching and Discussing the Video
Time: 4 minutes
Teaching Skill: Visual Learning/Discussion
Teacher’s Activity: The teacher introduces a short video clip about simple machines. “Now, let’s watch a video to see more simple machines!” The teacher plays the first 1:30 minutes of the video and pauses to ask questions like, “What simple machine did you see?” or “What did it do?”
Pupils’ Activity: Pupils watch the video, point to simple machines they see, and answer simple questions about them.
Learning Point: Pupils expand their visual recognition of simple machines and engage in simple discussion.
Step 6: Identifying Simple Machines in the Environment/Pictures
Time: 5 minutes
Teaching Skill: Application/Observation
Teacher’s Activity: The teacher shows pictures of different simple machines (e.g., a slide, a seesaw at the playground, a wheelbarrow). “Look at this picture! Is this a simple machine? What does it help us do?” The teacher guides pupils to identify and discuss.
Pupils’ Activity: Pupils point to and name simple machines in the pictures, explaining their uses in simple terms.
Learning Point: Pupils apply their knowledge to identify simple machines in various contexts.
Step 7: Evaluation/Review
Time: 4–5 minutes
Teaching Skill: Questioning/Assessment
Teacher’s Activity: The teacher checks pupils’ understanding through short questions and practical tasks.
- “What did we learn about today?”
- “Show me the scissors. Is it a simple machine?”
- “What does a bottle opener help us do?”
- (Pointing to a picture of a slide) “What is this? Is it a simple machine?”
Pupils’ Activity: Pupils respond orally and demonstrate the required skill where appropriate (e.g., pointing to objects or pictures).
Learning Point: Pupils demonstrate understanding of the lesson.
Step 8: Conclusion
Time: 2 minutes
Teaching Skill: Summarisation/Closure
Teacher’s Activity: The teacher summarises the lesson: “Today we learned about simple machines, tools that make our work easier! We saw scissors, bottle openers, and slides. Remember, simple machines are our helpers!” The teacher encourages pupils to look for simple machines at home and bring examples or describe them next time.
Pupils’ Activity: Pupils listen and say “Yes, simple machines are helpers!” They are encouraged to observe simple machines in their surroundings.
Learning Point: Pupils consolidate their learning and are encouraged to observe their environment.
Lesson Keywords
- Simple Machine – a tool that makes work easier.
- Scissors – a simple machine used for cutting.
- Bottle Opener – a simple machine used for opening bottles.
- Slide – a simple machine (inclined plane) used for moving down.
Differentiation
- Support: For pupils who need extra support, use larger pictures and fewer examples. Provide hand-over-hand guidance for pointing. Repeat names and uses multiple times. Focus on just two very familiar examples like scissors and a slide.
- Extension: For pupils who grasp the concept quickly, ask them to identify other simple machines they might have seen at home or in the playground, beyond the ones discussed. Encourage them to describe what the machine helps to do.
Community Join the conversation Open discussion +