

Class: Junior Secondary School 2 (JSS2, JSS 2)
Term: 1st Term
Week: 7
Age: 13 years
Duration: 45 minutes
Subject: Basic Science And Technology
Curriculum Theme: Basic Technology
Previous Lesson: Definitions, Types and Uses of Angles
Topic: Angles (Part 2)
Subject Matter: Bisection and construction of angles: (90°, 45°, 60°, 30°, 15° etc.)
Specific Objectives
By the end of the lesson, pupils should be able to:
- Cognitive Domain:
(a) State the steps in constructing different angles using a pair of compasses and a ruler.
(b) Explain how to bisect an angle into two equal parts. - Affective Domain:
(a) Show interest and attentiveness in learning how to construct and bisect angles. - Psychomotor Domain:
(a) Use a pair of compasses, ruler, and pencil to construct 90°, 45°, 60°, 30°, and 15° angles accurately. - Social Domain:
(a) Work cooperatively in groups to practice angle construction and bisection.
Reference Materials
The following resources was used in planning this lesson:
- 9 Years Basic Education Curriculum
- Lagos State Unified Scheme of work for Junior Secondary Schools
- IntMath – 45 Degree Angle in Geometry
- Relevant Textbooks
Instructional Materials
The teacher will teach this lesson with the aid of:
- Pair of compasses
- Ruler
- Pencil and eraser
- Protractor
- Chart showing steps in angle construction
- Whiteboard and marker
Rationale for the Lesson
Learning to bisect and construct angles helps pupils develop geometric drawing skills, accuracy, and logical reasoning which are essential in mathematics and technical drawing.
Prerequisite/Previous Knowledge
Pupils already know the definition of angles, types of angles, and how to measure them using a protractor from previous lessons.
Lesson Content/Board Summary
Angles
Bisection of an Angles
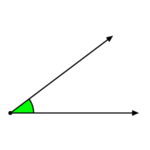
Bisection of an angle means dividing an angle into two equal parts using geometrical instruments such as a pair of compasses and a ruler.
The following are steps for bisecting an angle:
- Draw an angle (e.g., ∠ABC).
- Place the compass at the vertex (point B) and draw an arc cutting both arms of the angle at points P and Q.
- Without changing the compass width, draw arcs from P and Q to intersect at point R.
- Draw a straight line from B through R. This line divides ∠ABC into two equal parts.
Construction of 90° Angle
A 90° angle is a right angle and can be constructed using a pair of compasses.
The following are steps for constructing a 90° angle:
- Draw a straight line and mark a point O on it.
- With O as center, draw an arc to cut the line at A.
- With the same compass width, draw arcs above O from A.
- Connect the intersection of the arcs to O. This gives ∠AOB = 90°.
Construction of 45° Angle
45° is half of 90°, therefore it is constructed by bisecting a right angle.
The following are steps for constructing a 45° angle:
- Construct a 90° angle at point O.
- Place the compass at O and draw an arc cutting both arms of the 90° angle.
- Bisect the 90° angle using the steps of bisection.
- The resulting angle is 45°.
Construction of 60° Angle
A 60° angle is obtained directly using the compass method.
The following are steps for constructing a 60° angle:
- Draw a straight line and mark a point O.
- With O as center, draw an arc to cut the line at A.
- With the same compass setting, place at A and draw an arc that intersects the first arc at B.
- Join O to B to obtain ∠AOB = 60°.
Construction of 30° Angle
30° is half of 60°, and it is constructed by bisecting 60°.
The following are steps for constructing a 30° angle:
- Construct a 60° angle at point O.
- Place the compass at points A and B on the arms of the 60° angle and draw arcs intersecting inside.
- Draw a line from O to the intersection point.
- The resulting angle is 30°.
Construction of 15° Angle
15° is half of 30°, therefore it is obtained by bisecting 30°.
The following are steps for constructing a 15° angle:
- Construct a 30° angle at point O.
- Bisect the 30° angle using the method of angle bisection.
- The resulting angle is 15°.
Teaching Methods/Instructional Techniques:
Discussion, Lecture, Explanation, Demonstration, Question and Answer, Group Work, Practical Work
Instructional Procedures
To deliver this lesson, the teacher will adopt the following steps:
Step 1: Introduction
Time: 5 minutes
Teaching Skill: Set Induction
Teacher’s Activity: Teacher asks pupils to recall different types of angles studied in earlier lessons and introduces the topic by showing a protractor with 90°, 60°, 30° and 45°.
Pupils’ Activity: Pupils respond by naming types of angles and looking at the protractor.
Learning Point: Pupils are motivated and prepared for the lesson on angle construction and bisection.
Step 2: Bisection of Angles
Time: 10 minutes
Teaching Skill: Explanation and Demonstration
Teacher’s Activity: Teacher demonstrates step-by-step bisection of an angle on the board.
Pupils’ Activity: Pupils observe and attempt to replicate the steps in their exercise books.
Learning Point: Pupils learn how to bisect an angle correctly.
Step 3: Construction of Specific Angles
Time: 15 minutes
Teaching Skill: Demonstration and Practice
Teacher’s Activity: Teacher demonstrates how to construct 90°, 60°, 45°, 30°, and 15° angles using compass and ruler.
Pupils’ Activity: Pupils practice constructing each angle under teacher’s guidance.
Learning Point: Pupils master construction of different angles through practice.
Step 4: Group Practice
Time: 5 minutes
Teaching Skill: Supervised Group Work
Teacher’s Activity: Teacher divides pupils into small groups to practice constructing and bisecting angles.
Pupils’ Activity: Pupils work in groups and help one another.
Learning Point: Pupils develop teamwork and accuracy in angle construction.
Step 5: Note-Taking
Time: 5 minutes
Teaching Skill: Explanation
Teacher’s Activity: Teacher writes the summarized board content for pupils to copy.
Pupils’ Activity: Pupils copy notes into their exercise books.
Learning Point: Pupils have a written record of key learning points.
Step 6: Evaluation/Review
Time: 3 minutes
Teaching Skill: Questioning
Teacher’s Activity: The teacher evaluates the learning by asking the following questions:
- List the steps for bisecting an angle.
- What is the procedure for constructing 90°?
- How can we construct 45°?
- Which angle is obtained by bisecting 30°?
Pupils’ Activity: Pupils respond to the evaluation questions.
Learning Point: Pupils demonstrate their understanding of the lesson.
Step 7: Conclusion
Time: 2 minutes
Teaching Skill: Reinforcement
Teacher’s Activity: Teacher summarizes the lesson and emphasizes the importance of accuracy in construction.
Pupils’ Activity: Pupils listen attentively and ask questions if unclear.
Learning Point: Pupils appreciate the value of geometric accuracy.
Lesson Keywords
- Bisection – dividing an angle into two equal parts
- Construction – drawing accurately with compass and ruler
- Right Angle – an angle of 90°
- Arc – a part of the circumference of a circle
- Vertex – the point where two lines or arms of an angle meet
Differentiation
Teacher gives slower learners step-by-step guidance with simpler angles like 90° and 60°, while advanced learners construct more complex angles such as 15°.
Note for teachers using this lesson plan
Ensure all pupils have drawing instruments. Monitor accuracy closely and correct errors immediately. Reinforce the importance of neatness and precision in construction.


Community Join the conversation Open discussion +