

Class: Senior Secondary School 1 (SS1, SS 1, SSS1, SSS 1)
Term: 1st Term
Week: 8
Age: 15 years
Duration: 45 minutes
Subject: Basic Electronics
Curriculum Theme: Basic Electronics
Previous Lesson: Voltage, Current and Resistance: Meaning and Relationship.
Topic: RELATIONSHIP BETWEEN VOLTAGE, CURRENT AND RESISTANCE Measurement of voltage, current and resistance.
Subject Matter: units and symbols of voltage current and resistance, instruments for measuring voltage current and resistance, practical measurement using voltmeter ammeter and ohmmeter, safe handling of measuring instruments
Specific Objectives
By the end of the lesson, pupils should be able to:
Cognitive Domain:
- State the units and symbols for voltage, current, and resistance.
- Identify the instruments used for measuring voltage, current, and resistance.
- Explain the correct way to connect a voltmeter, ammeter, and ohmmeter in a circuit.
Affective Domain:
- Appreciate the importance of accurate measurements in electronics.
- Show interest in performing practical measurements.
- Adhere to safety precautions when handling electrical measuring instruments.
Psychomotor Domain:
- Connect a voltmeter, ammeter, and ohmmeter correctly in a circuit.
- Measure voltage, current, and resistance using the appropriate instruments.
- Handle measuring instruments safely during practical activities.
Social Domain:
- Collaborate with peers during practical measurement activities.
Reference Materials
The following resources were used in planning this lesson:
- 9 Years Basic Education Curriculum for Basic Technology.
- State Unified Scheme of Work for Basic Electronics SSS 1.
- NERDC Basic Technology for Senior Secondary Schools 1.
Instructional Materials
The teacher will teach this lesson with the aid of:
- Resistors
- Resistor box
- Connecting wires
- Circuit board
- Dry cells (batteries)
- Ammeter
- Ohmmeter
- Voltmeter
Rationale for the Lesson
This lesson helps pupils understand the fundamental electrical quantities and how to measure them, which is important for comprehending how electrical circuits and appliances work. It also teaches pupils how to safely use measuring instruments, which is a valuable skill in practical electronics and everyday life.
Prerequisite/Previous Knowledge
Pupils should have a basic understanding of electricity, electric current, voltage, and resistance from their Junior Secondary School Basic Technology lessons.
Lesson Content/Board Summary
RELATIONSHIP BETWEEN VOLTAGE, CURRENT AND RESISTANCE
Units and Symbols of Voltage, Current, and Resistance
Voltage, current, and resistance are fundamental quantities in an electric circuit.
The following are their units and symbols:
- Voltage (V) – Measured in Volts (V).
- Current (I) – Measured in Amperes (A).
- Resistance (R) – Measured in Ohms (Ω).
Instruments for Measuring Voltage, Current, and Resistance
Specific instruments are used to measure these electrical quantities accurately.
The following are the instruments and what they measure:
- Voltmeter – Measures voltage across two points in a circuit.
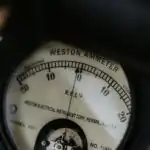
- Ammeter – Measures electric current flowing through a circuit.
- Ohmmeter – Measures the resistance of a component or circuit.
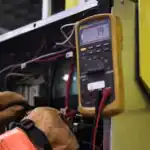
- Multimeter – A single instrument that can measure voltage, current, and resistance, among other quantities.
Practical Measurement Using Voltmeter, Ammeter, and Ohmmeter
Connecting measuring instruments correctly is essential for accurate readings and to prevent damage.
- Voltmeter Connection: A voltmeter is always connected in parallel across the component whose voltage is to be measured. This means it connects across two points.
- Ammeter Connection: An ammeter is always connected in series with the component or circuit where the current is to be measured. This means the circuit must be broken to insert the ammeter.
- Ohmmeter Connection: An ohmmeter is connected directly across the component whose resistance is to be measured. The component must be disconnected from any power source before measurement.
Safe Handling of Measuring Instruments
Safety precautions must be observed when using electrical measuring instruments.
The following are important safety measures:
- Always check the instrument’s range before connecting it to a circuit to avoid over-ranging.
- Ensure the power supply is off before connecting or disconnecting instruments, especially ammeters.
- Never connect an ohmmeter to a live circuit, as this can damage the instrument.
- Handle instruments carefully to prevent physical damage.
- Ensure hands are dry when working with electrical circuits.
- Follow the manufacturer’s instructions for each instrument.
Teaching Methods/Instructional Techniques
Discussion, Lecture, Demonstration, Question and Answer, Visual Aids
Instructional Procedures
Step 1: Introduction
Time: 5 minutes
Teaching Skill: Set Induction
Teacher’s Activity: The teacher greets the pupils and reviews the previous lesson on basic electrical quantities. The teacher then introduces the topic by asking pupils how they think we can know the exact voltage of a battery or the current flowing through a bulb.
Pupils’ Activity: Pupils respond to questions and listen attentively to the introduction.
Learning Point: Pupils recall previous knowledge and are introduced to the lesson’s topic.
Step 2: Presentation of Units and Symbols
Time: 7 minutes
Teaching Skill: Explanation/Illustration
Teacher’s Activity: The teacher writes down the main topic on the board. The teacher then explains voltage, current, and resistance, stating their units and symbols clearly on the board. The teacher asks pupils to repeat the units and symbols.
Pupils’ Activity: Pupils listen, observe the board, and repeat the units and symbols after the teacher.
Learning Point: Pupils learn the correct units and symbols for voltage, current, and resistance.
Step 3: Presentation of Measuring Instruments
Time: 8 minutes
Teaching Skill: Demonstration/Identification
Teacher’s Activity: The teacher displays the voltmeter, ammeter, ohmmeter, and a multimeter. The teacher identifies each instrument and explains what it measures, allowing pupils to examine them closely.
Pupils’ Activity: Pupils observe the instruments, listen to the explanations, and ask questions for clarification.
Learning Point: Pupils identify the instruments used for measuring electrical quantities.
Step 4: Demonstration of Practical Measurement
Time: 10 minutes
Teaching Skill: Demonstration/Practical Application
Teacher’s Activity: The teacher sets up simple circuits using dry cells, resistors, and connecting wires. The teacher then demonstrates how to correctly connect the voltmeter (in parallel), ammeter (in series), and ohmmeter (across a disconnected component) to measure voltage, current, and resistance, explaining each step.
Pupils’ Activity: Pupils observe the demonstration carefully, noting the connection methods and measurement procedures.
Learning Point: Pupils understand the practical steps for measuring voltage, current, and resistance.
Step 5: Guided Practice
Time: 8 minutes
Teaching Skill: Guided Practice/Supervision
Teacher’s Activity: The teacher divides pupils into small groups and provides each group with some components and measuring instruments. The teacher guides and supervises pupils as they attempt to connect the instruments and take simple measurements.
Pupils’ Activity: Pupils work in groups to practice connecting instruments and taking measurements under the teacher’s guidance.
Learning Point: Pupils gain hands-on experience in measuring electrical quantities.
Step 6: Discussion on Safe Handling
Time: 4 minutes
Teaching Skill: Explanation/Safety Instruction
Teacher’s Activity: The teacher discusses the importance of safe handling of electrical measuring instruments, highlighting key safety precautions such as checking ranges, disconnecting power, and avoiding connecting ohmmeters to live circuits.
Pupils’ Activity: Pupils listen and contribute to the discussion on safety, noting important precautions.
Learning Point: Pupils learn about the safe handling of electrical measuring instruments.
Step 7: Evaluation/Review
Time: 5 minutes
Teaching Skill: Questioning/Assessment
Teacher’s Activity: The teacher evaluates the learning by asking the following questions:
- State the unit and symbol for: a) Voltage b) Current c) Resistance.
- Mention two instruments used for measuring electrical quantities.
- How is an ammeter connected in a circuit?
- State one safety precaution to observe when using an ohmmeter.
Pupils’ Activity: Pupils answer orally and in writing.
Learning Point: Pupils demonstrate understanding of the lesson.
Step 8: Conclusion
Time: 3 minutes
Teaching Skill: Summarization/Homework
Teacher’s Activity: The teacher summarizes the key points of the lesson, reiterating the units, symbols, instruments, measurement techniques, and safety. The teacher then assigns homework: “Draw and label the symbol for a voltmeter and an ammeter.”
Pupils’ Activity: Pupils listen to the summary and copy the homework assignment.
Learning Point: Pupils reinforce their understanding and are given a task to consolidate learning.
Lesson Keywords
- Voltage – The electrical potential difference between two points.
- Current – The flow of electric charge.
- Resistance – The opposition to the flow of electric current.
- Voltmeter – An instrument used to measure voltage.
- Ammeter – An instrument used to measure electric current.
- Ohmmeter – An instrument used to measure electrical resistance.
- Series Connection – Components connected end-to-end, forming a single path for current.
- Parallel Connection – Components connected across the same two points, providing alternative paths for current.
Differentiation
For pupils who grasp concepts quickly, they can be challenged to measure the resistance of combinations of resistors (series and parallel). For pupils needing more support, the teacher will provide additional one-on-one guidance during practical sessions and simplify explanations. Group activities will encourage peer learning and support.
Note for teachers using this lesson plan
Ensure all measuring instruments and components are functional before the lesson. Emphasize safety throughout the practical sessions. Allow ample time for pupils to handle instruments under supervision. Encourage questions and provide clear, concise answers to aid understanding.

Community Join the conversation Open discussion +