

Class: Junior Secondary School 3 (JSS3, JSS 3)
Term: 2nd Term
Week: 10
Age: 14 years
Duration: 45 minutes
Subject: Mathematics
Curriculum Theme: Mathematics
Previous Lesson: Construction – Bisecting Lines, Angles, and Shapes
Topic: Construction (Part 2)
Subject Matter: Construction of standard angles of various sizes 90°, 60°, 45°, 30°, copying a given angle
Specific Objectives
By the end of the lesson, pupils should be able to:
- Cognitive Domain:
(a) Explain the steps involved in constructing standard angles.
(b) Identify the instruments used in angle construction. - Affective Domain:
(a) Demonstrate willingness to handle mathematical instruments carefully.
(b) Appreciate the importance of accuracy in geometrical construction. - Psychomotor Domain:
(a) Construct angles of 30°, 45°, 60°, and 90° using a compass and ruler.
(b) Copy a given angle correctly. - Social Domain:
(a) Work collaboratively in pairs while practising constructions.
Reference Materials
The following resources was used in planning this lesson:
- 9 Years Basic Education Curriculum
- Lagos State Unified Scheme of Work for Junior Secondary Schools
- Cuemath – Construction of Angles – Using Protractor and Compass, Steps of Constructions, Examples
- Relevant Textbooks
Instructional Materials
The teacher will teach this lesson with the aid of:
- Compass
- Ruler
- Pencil
- Protractor
- Drawing sheets
- Angle construction charts
Rationale for the Lesson
Understanding angle construction improves learners’ precision, problem-solving skills, and ability to interpret geometric drawings accurately.
Prerequisite/Previous Knowledge
Pupils already understand basic geometric terms, angle types, and how to use a ruler and compass.
Lesson Content/Board Summary
Lesson Content
Construction Of Standard Angles
Meaning of Construction in Geometry
Construction in geometry refers to drawing shapes, angles, or lines accurately using only a compass and a straightedge without measurement markings. It ensures precision and helps in understanding geometric relationships.
Construction of Standard Angles
Standard angles can be constructed using fixed compass widths and simple geometric principles.
The following are standard angles and their constructions:
- Construction of 60° Angle
A 60° angle is constructed using an equilateral triangle principle where all sides and angles are equal.
The following are the steps:- Draw a straight line AB.
- With A as centre, draw an arc above line AB.
- With the same radius and B as centre, draw another arc to intersect the first arc at point C.
- Join A to C to form ∠CAB = 60°.
- Construction of 90° Angle
A 90° angle is constructed by forming a perpendicular line from a point on a straight line.
These include:- Draw a straight line AB.
- Mark a point A on the line.
- With A as centre, draw an arc cutting the line at two points.
- With the two new points as centres, draw arcs above the line to meet at point C.
- Join A to C to form a 90° angle.
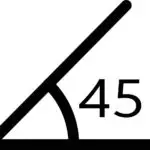
- Construction of 45° Angle
A 45° angle is constructed by bisecting a 90° angle.
The following are the steps:- Construct a 90° angle.
- With A as centre, draw an arc across both arms.
- Using the two arc points, draw arcs to intersect at D.
- Join A to D to get 45°.
- Construction of 30° Angle
A 30° angle is constructed by bisecting a 60° angle.
Examples include:- Construct a 60° angle.
- Bisect the angle using the compass.
- The resulting angle is 30°.
Copying a Given Angle
Copying an angle involves reproducing an existing angle using a compass without needing a protractor.
The following are the steps:
- Draw a straight line and label one endpoint P.
- Place the compass on the vertex of the given angle and draw an arc across both arms.
- Without changing the compass width, draw a similar arc from point P.
- Measure the distance between the arc points on the given angle.
- Transfer this distance to the new arc from P.
- Join P to the transferred point to complete the copied angle.
Teaching Methods/Instructional Techniques
Discussion, Explanation, Demonstration, Guided Practice, Group Work, Visual Aids
Instructional Procedures
To deliver this lesson, the teacher will adopt the following steps:
Step 1: Introduction
Time: 5 minutes
Teaching Skill: Set Induction
Teacher’s Activity: The teacher reviews previous work on basic angle types and shows a chart of common geometrical instruments.
Pupils’ Activity: Pupils observe and respond to questions.
Learning Point: Pupils recall prior knowledge relevant to construction.
Step 2: Construction of Standard Angles
Time: 10 minutes
Teaching Skill: Explanation
Teacher’s Activity: The teacher explains the meaning and importance of geometric construction and demonstrates how to construct 60°, 90°, 45°, and 30° angles.
Pupils’ Activity: Pupils listen and observe demonstrations.
Learning Point: Pupils understand steps for constructing standard angles.
Step 3: Demonstration on Copying Angles
Time: 10 minutes
Teaching Skill: Demonstration
Teacher’s Activity: The teacher demonstrates how to copy a given angle using a compass and ruler.
Pupils’ Activity: Pupils watch closely and ask questions.
Learning Point: Pupils learn accurate methods of transferring angles.
Step 4: Class Practice on Angle Construction
Time: 10 minutes
Teaching Skill: Guided Practice
Teacher’s Activity: The teacher guides pupils in pairs as they construct and copy angles from given examples.
Pupils’ Activity: Pupils work together to practise constructions.
Learning Point: Pupils apply learnt skills to practical tasks.
Step 5: Note-Taking
Time: 3 minutes
Teaching Skill: Reinforcement
Teacher’s Activity: The teacher dictates and displays the board summary for pupils to copy.
Pupils’ Activity: Pupils write the notes.
Learning Point: Pupils document key points of the lesson.
Step 6: Evaluation/Review
Time: 5 minutes
Teaching Skill: Assessment
Teacher’s Activity: The teacher evaluates the learning by asking the following questions:
- What is geometric construction?
- List the instruments used in angle construction.
- State the steps for constructing a 60° angle.
- How do you copy a given angle?
- Construct any one standard angle.
Pupils’ Activity: Pupils answer questions.
Learning Point: Pupils’ understanding is assessed.
Step 7: Conclusion
Time: 2 minutes
Teaching Skill: Summary
Teacher’s Activity: The teacher summarizes the lesson and reinforces accuracy in construction.
Pupils’ Activity: Pupils listen and ask final questions.
Learning Point: Pupils understand the importance of exactness in geometric work.
Lesson Keywords
- Construction – drawing shapes using compass and ruler
- Angle – space between two intersecting lines
- Bisect – divide into two equal parts
- Vertex – point where two lines meet
- Arc – part of a circle drawn by a compass
Differentiation
Provide additional support for slower learners through step-by-step guidance, while advanced learners can attempt constructing other angles independently.
Note for Teachers Using This Lesson Plan
Ensure instruments are in good condition, guide pupils patiently, and emphasize precision and neatness during construction tasks.


Community Join the conversation Open discussion +