

Class: Junior Secondary School 2 (JSS2, JSS 2)
Term: 1st Term
Week: 6
Age: 13 years
Duration: 45 minutes
Subject: Pre-Vocational Studies
Curriculum Theme: Home Economics
Previous Lesson: Clothing Repairs – Meaning and Techniques
Topic: Patching
Subject Matter: Meaning of Patching, Types of Patching
Specific Objectives
By the end of the lesson, pupils should be able to:
- Cognitive Domain:
(a) Define patching as a method of mending torn fabrics.
(b) List and explain the types of patching used in garment repair. - Affective Domain:
(a) Appreciate the importance of patching as a way of maintaining neat and durable clothing. - Psychomotor Domain:
(a) Demonstrate how to prepare and attach a patch neatly on a torn fabric. - Social Domain:
(a) Work cooperatively in pairs to identify and discuss types of patching on sample garments.
Reference Materials
The following resources was used in planning this lesson:
- 9 Years Basic Education Curriculum
- Lagos State Unified Scheme of work for Junior Secondary Schools
- Sewing.com – “How to Patch Clothes” (https://sewing.com/how-to-patch-clothes/)
- Relevant Textbooks
Instructional Materials
The teacher will teach this lesson with the aid of:
- Needle and thread
- Fabric samples with tears or holes
- Scissors
- Iron and ironing board
- Sample garments showing patching
- Pictures or charts of patching methods
Rationale for the Lesson
This lesson helps pupils understand how to repair torn clothes through patching, thereby promoting neatness, saving cost, and encouraging proper garment care.
Prerequisite/Previous Knowledge
Pupils have previously learned about simple garment repairs such as hemming and temporary stitching. They can identify torn garments and understand the need for mending.
Lesson Content/Board Summary
Patching
Meaning of Patching
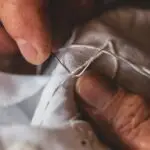
Patching is a method of repairing a torn or worn-out part of a fabric by placing another piece of material, known as a patch, over or under the damaged area and stitching it neatly. It helps to restore the appearance and strength of the garment.
The following are the reasons for patching clothes:
- To repair torn or worn-out areas of a fabric.
- To extend the life span of the garment.
- To save money by avoiding replacement.
- To maintain a neat and tidy appearance.
- To add decoration or design to old clothing.
Types of Patching
There are different methods used in patching depending on the type of tear and the fabric texture.
The following are the types of patching:
- Under Patching: The patch is placed under the torn part and sewn neatly on top. It is suitable for small tears or holes.
- Over Patching: The patch is placed on top of the torn area and stitched firmly. It is often used for thick materials like jeans or uniforms.
- Darning Patch: This involves weaving threads across the torn part to cover it instead of using a fabric patch. It is ideal for small holes in socks and knitwear.
- Decorative Patching: The patch is attached with decorative stitches or colourful fabrics to beautify clothes. It serves both as repair and design.
Steps in Patching a Fabric
To patch a torn fabric properly, one must follow certain steps to ensure neatness and durability.
The following are the steps in patching:
- Select a matching piece of fabric for the patch.
- Cut the patch slightly larger than the torn area.
- Turn in the edges of the patch to prevent fraying.
- Place the patch neatly over or under the tear.
- Pin the patch to hold it in place.
- Sew the patch neatly around the edges with small stitches.
- Press the patch with a warm iron to smoothen it.
Teaching Methods/Instructional Techniques:
Lecture, Discussion, Explanation, Demonstration, Question and Answer, Group Work
Instructional Procedures
To deliver this lesson, the teacher will adopt the following steps:
Step 1: Introduction
Time: 5 minutes
Teaching Skill: Set Induction
Teacher’s Activity: Teacher displays a torn piece of cloth and asks pupils how they can make it useful again.
Pupils’ Activity: Pupils respond by suggesting mending or patching.
Learning Point: Pupils are introduced to the concept of patching as a way of repairing torn fabrics.
Step 2: Meaning and Purpose of Patching
Time: 10 minutes
Teaching Skill: Explanation
Teacher’s Activity: The teacher explains the meaning and reasons for patching, showing examples of patched fabrics.
Pupils’ Activity: Pupils listen attentively and observe the fabric samples.
Learning Point: Pupils understand the meaning and purpose of patching.
Step 3: Types of Patching
Time: 10 minutes
Teaching Skill: Discussion
Teacher’s Activity: The teacher discusses the various types of patching and displays examples of each type.
Pupils’ Activity: Pupils identify and name the types of patching shown.
Learning Point: Pupils learn to distinguish between the types of patching.
Step 4: Demonstration of Patching Steps
Time: 10 minutes
Teaching Skill: Demonstration
Teacher’s Activity: The teacher demonstrates step-by-step how to patch a fabric using under patching and over patching methods.
Pupils’ Activity: Pupils observe and then practice patching in pairs.
Learning Point: Pupils learn the correct procedures for patching torn fabrics.
Step 5: Note-Taking
Time: 5 minutes
Teaching Skill: Explanation
Teacher’s Activity: The teacher writes the board summary and instructs pupils to copy it into their notes.
Pupils’ Activity: Pupils copy the notes neatly.
Learning Point: Pupils record important information for future reference.
Step 6: Evaluation/Review
Time: 3 minutes
Teaching Skill: Questioning
Teacher’s Activity: The teacher evaluates the learning by asking the following questions:
- What is patching?
- List and explain two types of patching.
- Mention three steps in patching a torn fabric.
- State two reasons why patching is important.
Pupils’ Activity: Pupils respond orally to the questions.
Learning Point: Pupils demonstrate understanding of patching and its importance.
Step 7: Conclusion
Time: 2 minutes
Teaching Skill: Reinforcement
Teacher’s Activity: The teacher summarizes the lesson and encourages pupils to apply patching at home.
Pupils’ Activity: Pupils listen and ask relevant questions.
Learning Point: Pupils appreciate patching as a useful clothing repair method.
Lesson Keywords
- Patching – repairing torn fabric with another piece of cloth
- Under Patching – placing patch beneath the torn area
- Over Patching – placing patch on top of the torn area
- Darning – repairing holes by weaving new threads
- Fraying – loose threads at the edge of fabric
Differentiation
Teacher provides additional support and closer supervision for slower learners during the demonstration, while faster learners assist peers and attempt decorative patching.
Note for teachers using this lesson plan
Ensure that all pupils handle needles and scissors safely. Emphasize neatness and accuracy while sewing. Encourage pupils to bring old fabrics from home for practice.


Community Join the conversation Open discussion +