

Class: Senior Secondary School 2 (SS2 / SSS 2)
Term: Third Term
Week: 6
Age: 16 years
Duration: 45 minutes
Subject: Technical Drawing
Curriculum Theme: Building Construction
Previous Lesson: Building Design and Working Drawing: Building Design Process.
Topic: BUILDING DESIGN AND WORKING DRAWING
Subject Matter: Working drawings showing building plans, elevations, electrical symbols, plumbing symbols, dimensions
Specific Objectives
By the end of the lesson, pupils should be able to:
Cognitive Domain:
- Define working drawings and state their importance in building construction.
- Identify the various components of a working drawing such as plans, elevations, electrical symbols, and plumbing symbols.
- Explain the purpose of dimensioning in working drawings.
Affective Domain:
- Appreciate the importance of accuracy and clarity in technical drawings.
- Show interest in learning and interpreting building designs.
Psychomotor Domain:
- Draw a simple building plan to given specifications.
- Sketch basic building elevations from a given plan.
- Identify and correctly use common electrical and plumbing symbols in a drawing.
- Apply appropriate dimensioning techniques to a drawing.
Social Domain:
- Collaborate with peers to discuss different aspects of building design.
- Communicate ideas effectively through technical drawings.
Reference Materials
The following resources were used in planning this lesson:
- Senior Secondary Schools Education Curriculum
- State Unified Scheme of Work
- Technical Drawing for Senior Secondary Schools by A.B. Oluyide
Instructional Materials
The teacher will teach this lesson with the aid of:
- Models of buildings
- Posters showing various building plans and elevations
- Charts displaying common electrical and plumbing symbols
- Drawing boards, T-squares, set squares, pencils, erasers, and drawing paper
Rationale for the Lesson
Understanding working drawings is important for pupils as it provides them with the fundamental skills required in architecture, civil engineering, and construction. It enables them to interpret and create technical documents essential for building projects and offers practical insights into the design process.
Prerequisite/Previous Knowledge
Pupils should have basic knowledge of drawing instruments, scales, orthographic projections, and the principles of technical drawing.
Lesson Content/Board Summary
BUILDING DESIGN AND WORKING DRAWING
1. Working Drawings
Working drawings are detailed technical drawings that provide all the necessary information for the construction of a building or product. They serve as a guide for builders, engineers, and other construction professionals.
2. Components of Working Drawings
Working drawings typically include the following components:
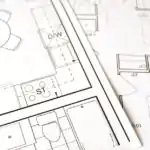
- Building Plans: These are top-down views of a building, showing the layout of rooms, walls, doors, windows, and other features at a specific floor level. They are usually drawn to scale.
- Elevations: These are external views of a building from different sides (front, rear, left, right). They show the external appearance, height, and architectural features of the building.
- Electrical Symbols: These are standardized graphic representations used to indicate the location and type of electrical fittings and circuits in a building plan.
- Plumbing Symbols: These are standardized graphic representations used to indicate the location and type of plumbing fixtures, pipes, and fittings in a building plan.
- Dimensions: These are numerical values that indicate the sizes, lengths, widths, and heights of various parts of a building or its components. They ensure that the building is constructed to the correct measurements.
3. Examples of Common Symbols
- Electrical Symbols:
- Light Point: A circle with two diagonal lines crossing through it.
- Socket Outlet: A circle with two short lines extending from the bottom.
- Switch: A circle with a “S” inside.
- Plumbing Symbols:
- Water Closet (WC): An elongated oval shape.
- Wash Hand Basin: A rectangular or oval shape with a small circle in the middle.
- Shower Head: A small circle with radial lines.
4. Importance of Dimensioning
Dimensioning is important because it:
- Provides exact measurements for construction.
- Ensures accuracy and precision in building.
- Helps in estimating materials and costs.
- Facilitates clear communication among construction teams.
Teaching Methods/Instructional Techniques
Discussion, Lecture, Demonstration, Question and Answer, Visual Aids
Instructional Procedures
Step 1: Introduction
Time: 5 minutes
Teaching Skill: Set Induction
Teacher’s Activity: The teacher greets the pupils and asks them what they understand by a “drawing” in the context of building construction. The teacher then introduces the topic: Building Design and Working Drawing.
Pupils’ Activity: Pupils respond to the questions and listen attentively to the introduction.
Learning Point: Pupils are engaged and the lesson is introduced.
Step 2: Explanation of Working Drawings
Time: 7 minutes
Teaching Skill: Explanation/Definition
Teacher’s Activity: The teacher explains what working drawings are, emphasizing their role as detailed guides for construction. The teacher uses posters and models to illustrate.
Pupils’ Activity: Pupils listen, take notes, and ask questions for clarification.
Learning Point: Pupils understand the definition and purpose of working drawings.
Step 3: Building Plans
Time: 7 minutes
Teaching Skill: Demonstration/Illustration
Teacher’s Activity: The teacher explains building plans, showing examples of different room layouts and features on a poster. The teacher demonstrates how doors and windows are represented.
Pupils’ Activity: Pupils observe the examples and identify different parts of a building plan.
Learning Point: Pupils learn how to interpret and sketch basic building plans.
Step 4: Elevations
Time: 7 minutes
Teaching Skill: Explanation/Visualisation
Teacher’s Activity: The teacher explains elevations, describing them as external views. The teacher uses building models and posters to show front, rear, and side elevations, highlighting key features like roofs and windows.
Pupils’ Activity: Pupils identify different elevations and their features from the provided visual aids.
Learning Point: Pupils understand how to represent and interpret building elevations.
Step 5: Electrical and Plumbing Symbols
Time: 7 minutes
Teaching Skill: Identification/Classification
Teacher’s Activity: The teacher introduces common electrical and plumbing symbols using a chart. The teacher explains what each symbol represents and its importance in a working drawing.
Pupils’ Activity: Pupils identify and sketch some of the symbols in their notebooks.
Learning Point: Pupils learn to recognize and use standard electrical and plumbing symbols.
Step 6: Dimensioning
Time: 5 minutes
Teaching Skill: Instruction/Application
Teacher’s Activity: The teacher explains the concept and rules of dimensioning in working drawings. The teacher demonstrates how to correctly place dimensions on a simple drawing.
Pupils’ Activity: Pupils pay attention to the rules and practice simple dimensioning on a sketch.
Learning Point: Pupils understand the principles of accurate dimensioning.
Step 7: Evaluation/Review
Time: 5 minutes
Teaching Skill: Questioning/Assessment
Teacher’s Activity: The teacher evaluates the learning by asking the following questions:
- What are working drawings?
- Mention three components of a working drawing.
- Describe the difference between a building plan and an elevation.
- Sketch two common electrical symbols and two common plumbing symbols.
Pupils’ Activity: Pupils answer orally and in writing.
Learning Point: Pupils demonstrate understanding of the lesson.
Step 8: Conclusion
Time: 2 minutes
Teaching Skill: Summarization
Teacher’s Activity: The teacher summarizes the key learning points of the lesson, emphasizing the importance of accuracy in technical drawings. The teacher then assigns homework for pupils to draw a simple building plan with dimensions and symbols.
Pupils’ Activity: Pupils listen to the summary and copy down the homework.
Learning Point: The lesson is concluded and homework is assigned.
Lesson Keywords
- Working Drawings – Detailed technical drawings for construction.
- Building Plans – Top-down views showing building layout.
- Elevations – External views showing building appearance.
- Electrical Symbols – Graphic representations for electrical fittings.
- Plumbing Symbols – Graphic representations for plumbing fixtures.
- Dimensions – Numerical values indicating sizes and measurements.
Differentiation
For pupils who grasp the concepts quickly, the teacher will provide more complex building specifications for design practice. For those who require more support, the teacher will offer simplified drawing tasks and provide individual guidance during practical sessions.
Note for teachers using this lesson plan
Encourage pupils to practice drawing and interpreting working drawings regularly. Provide various examples of building plans and elevations from local contexts to make the lesson more relatable. Emphasize the importance of using appropriate scales and drawing instruments for accuracy. Practical drawing exercises should be a significant part of the lesson.

Community Join the conversation Open discussion +