

Note for teachers using this lesson plan
This lesson focuses on identifying loam soil texture and conducting a hydrometer test. Ensure all soil samples, a hydrometer, water, and labels are prepared before class. Emphasise safety during the practical activity and guide students to collaborate effectively in their groups. By the end of the lesson, students should be able to correctly identify loam soil and demonstrate the procedure for a hydrometer test.
Class: JSS 1
Term: First Term
Week: 5
Age: 12 years
Duration: 45 minutes
Subject: Horticulture and Crop Production
Curriculum Theme: Crop Production
Focal competence: identify different soil texture
Key competencies/values: Collaboration; Critical Thinking; Respect
Skills:
- Identifying soil texture
- Conducting hydrometer tests
Previous Lesson: Clay and Silt Soils, Texture and Characteristics
Topic: Types Of Soil Texture: Loam soil
Subject Matter: Loam soil, texture and components, Hydrometer test
Specific Objectives
By the end of the lesson, pupils/students should be able to:
Cognitive Domain
- Identify loam as a type of soil texture.
- Explain the purpose of a hydrometer test.
Affective Domain
- Appreciate the importance of identifying soil texture for crop production.
- Cooperate with group members during practical activities.
Psychomotor Domain
- Conduct a simple hydrometer test using provided materials.
- Label different soil samples correctly.
- Take different soil samples for testing.
Social Domain
- Collaborate effectively in groups to achieve shared practical goals.
Reference Materials
The following resources were used in planning this lesson:
- 2025 Revised 9 Years Basic Education Curriculum
- Relevant State Unified Scheme of Work
- Basic Agriculture for Junior Secondary Schools, Book 1
- The HeadTeacher Scheme of work
Instructional Materials
The teacher will teach this lesson with the aid of:
- Soil samples (sand, silt, clay, and loam if available)
- Soil triangle chart
- Hydrometer
- Measuring cylinder or clear jars
- Water
- Labels
- Chart showing soil components
- Video clips demonstrating the hydrometer test (optional)
- Whiteboard
- Marker
Rationale for the Lesson
This lesson is important because understanding soil texture is fundamental to successful crop production. Knowing the texture of soil helps farmers choose appropriate crops and manage water and nutrient application effectively. The hydrometer test provides a practical method for students to determine soil texture, enhancing their critical thinking and practical skills in agriculture.
Prerequisite/Previous Knowledge
Students should have a basic understanding of what soil is, its importance for plants, and that soil is made up of different components.
Lesson Content/Board Summary
Soil Texture: Loam Soil
What is Loam Soil?
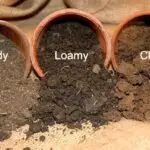
Loam is a rich, crumbly type of soil made from a balanced mix of sand, silt, and clay. It is considered the best soil for growing plants because it stays moist, holds nutrients, and drains extra water.
Main Composition of Loam
- Sand: Large particles that help water drain well and let air into the soil.
- Silt: Medium particles that hold moisture and smooth out the texture.
- Clay: Tiny particles that hold onto important nutrients.
Characteristics of Loam Soil
Loam soil is considered the ideal soil for most crops because it is a balanced mixture of sand, silt, and clay. Its characteristics include:
- It has good water retention, meaning it holds enough water for plants without becoming waterlogged.
- It drains well, preventing root rot.
- It is rich in nutrients and organic matter.
- It is easy to work with (till) and allows good air circulation for roots.
- It feels crumbly and soft to the touch.
The Hydrometer Test for Soil Texture
The hydrometer test is a laboratory method used to determine the percentages of sand, silt, and clay in a soil sample. It works on the principle that larger, heavier particles (sand) settle faster in water than smaller, lighter particles (silt and clay).
Steps to Conduct a Hydrometer Test
- Prepare Soil Sample: Take a representative soil sample, remove large debris, and air-dry it.
- Weigh Soil: Weigh a specific amount of the dry soil (e.g., 50 grams).
- Disperse Soil: Place the soil in a measuring cylinder or clear jar, add water, and a dispersing agent (if available) to break up soil aggregates. Shake vigorously to ensure all particles are separated.
- Allow Settling: Place the cylinder on a flat surface and allow the particles to settle.
- Take Readings:
- After 40 seconds, read the hydrometer. This reading helps determine the sand content.
- After 2 hours, take another hydrometer reading. This reading helps determine the silt and clay content.
- Calculate Percentages: Use the hydrometer readings and a soil triangle chart to calculate the percentages of sand, silt, and clay, and thus determine the soil texture class.
Labeling Soil Texture
After conducting the hydrometer test and determining the soil texture, it is important to label the soil samples clearly. Labels should include:
- Sample identification (e.g., “Sample A,” “Farm Plot 1”)
- Date of sampling
- Determined soil texture (e.g., “Loam,” “Sandy Clay”)
Teaching Methods/Instructional Techniques
Discussion, Demonstration, Guided Practice, Question and Answer, Explanation, Observation, Group Work, Practical Activity
Instructional Procedures
Step 1: Introduction
Time: 5 minutes
Teaching Skill: Questioning/Activating prior knowledge
Teacher’s Activity: The teacher asks students what they know about soil and its importance. The teacher then introduces the topic of soil texture, explaining that different soils feel different and are suitable for different crops.
Pupils’ Activity: Students respond to questions and listen attentively to the introduction.
Learning Point: Importance of soil texture
Step 2: Explanation of Soil Texture and Types
Time: 8 minutes
Teaching Skill: Explanation/Visual aid
Teacher’s Activity: The teacher explains what soil texture is, using the chart showing soil components. The teacher describes the three main types of soil particles (sand, silt, clay) and their general characteristics, showing examples of each if available.
Pupils’ Activity: Students observe the chart and soil samples, listening to the explanations.
Learning Point: Soil texture definition and types
Step 3: Focus on Loam Soil
Time: 5 minutes
Teaching Skill: Description/Comparison
Teacher’s Activity: The teacher specifically explains loam soil, highlighting its balanced composition and why it is considered ideal for agriculture. The teacher compares loam’s properties to those of purely sandy or clayey soils.
Pupils’ Activity: Students listen and ask questions about loam soil characteristics.
Learning Point: Characteristics of loam soil
Step 4: Introduction to the Hydrometer Test
Time: 5 minutes
Teaching Skill: Explanation/Purpose
Teacher’s Activity: The teacher introduces the hydrometer test as a method to determine soil texture. The teacher explains the principle behind the test (settling rates of particles) and shows the hydrometer instrument.
Pupils’ Activity: Students observe the hydrometer and listen to the explanation of the test’s purpose.
Learning Point: Hydrometer test purpose
Step 5: Demonstration of Hydrometer Test Steps
Time: 7 minutes
Teaching Skill: Demonstration/Instruction
Teacher’s Activity: The teacher demonstrates the steps of conducting a hydrometer test using a prepared soil sample, water, and a measuring cylinder. The teacher explains each step clearly, from preparing the sample to taking readings.
Pupils’ Activity: Students observe the demonstration carefully, noting the steps involved.
Learning Point: Hydrometer test procedure
Step 6: Group Practical Activity: Conducting and Labeling
Time: 6 minutes
Teaching Skill: Guided practice/Collaboration
Teacher’s Activity: The teacher divides students into groups, provides each group with soil samples, jars, water, and labels. The teacher guides them to conduct a simplified hydrometer test and label their samples based on observation (e.g., how quickly particles settle, feel of the soil).
Pupils’ Activity: Students work in groups to conduct the test, observe, and label their soil samples under teacher’s guidance.
Learning Point: Practical soil texture identification
Step 7: Evaluation/Review
Time: 5 minutes
Teaching Skill: Questioning/Assessment
Teacher’s Activity: The teacher evaluates the learning by asking the following questions:
- What is soil texture?
- Mention one characteristic of loam soil.
- What is the purpose of a hydrometer test?
- Briefly describe one step in conducting a hydrometer test.
Pupils’ Activity: Pupils answer orally and in writing.
Learning Point: Assessment of understanding
Step 8: Note-Taking
Time: 4 minutes
Teaching Skill: Guided Writing
Teacher’s Activity: The teacher guides pupils/students to copy the essential Board Summary notes on types of soil texture, loam, and the hydrometer test into their notebooks.
Pupils’ Activity: Pupils/students copy the notes carefully into their notebooks.
Learning Point: Recording lesson content
Step 9: Conclusion
Time: 2 minutes
Teaching Skill: Reinforcement
Teacher’s Activity: The teacher briefly reminds students that understanding soil texture, especially loam, is vital for growing healthy crops and encourages them to observe soil textures in their environment.
Pupils’ Activity: Students listen and reflect on the importance of the lesson.
Learning Point: Reinforcement of soil texture importance
Continuous Assessment/Further Study
Type: Homework/Practical Observation
Instruction: Observe the soil in your compound or a nearby farm and answer the following questions:
- Take a small sample of soil from your compound. Describe how it feels (gritty, smooth, sticky, crumbly).
- Based on its feel, what type of soil texture do you think it is? (e.g., sandy, clayey, loamy)
- Why is it important for farmers to know the texture of their soil?
Lesson Keywords
- Soil Texture – The relative proportions of sand, silt, and clay particles in the soil.
- Sand – The largest soil particles, gritty to the touch.
- Silt – Medium-sized soil particles, smooth and powdery.
- Clay – The smallest soil particles, sticky when wet.
- Loam – A balanced mixture of sand, silt, and clay, ideal for agriculture.
- Hydrometer Test – A method used to determine the percentages of sand, silt, and clay in soil.
Differentiation
For weaker learners: Provide pre-labeled soil samples (sand, silt, clay, loam) for them to feel and compare before the hydrometer test. Pair them with stronger learners during the group activity and provide a simplified step-by-step guide for the hydrometer test. Focus on identifying loam and understanding its basic properties.
For faster learners: Challenge them to research other methods of determining soil texture (e.g., ribbon test). Ask them to explain how different soil textures affect specific crops or agricultural practices. Encourage them to lead their groups during the practical activity and help explain concepts to their peers.
Suggested Lesson Videos
For visual demonstrations of soil texture and the hydrometer test, search on YouTube for: JSS1 soil texture hydrometer test
Teacher Guide for Using This Lesson Plan
Before the lesson, ensure you have all instructional materials ready, especially the soil samples (sand, silt, clay, loam if possible) and a working hydrometer with a clear measuring cylinder or jar. It is helpful to conduct a practice hydrometer test beforehand to anticipate any challenges. Begin by engaging students with questions about soil. Clearly explain soil texture and the unique properties of loam, using visual aids. When demonstrating the hydrometer test, explain each step slowly and clearly. During the group activity, circulate among the groups to provide support, correct misconceptions, and ensure all students are participating safely and effectively. Remind students to copy the Board Summary notes during the designated note-taking time. Emphasise the practical application of understanding soil texture in real-world farming scenarios.

Community Join the conversation Open discussion +