

Class: Senior Secondary School 2 (SS2 / SSS2)
Term: 3rd Term
Week: 11
Age: 16 years
Duration: 45 minutes
Subject: Visual Art
Curriculum Theme: Creative Arts and Crafts
Previous Lesson: .
Topic: TEXTILE DESIGN AND PRINTING PROCESS
Subject Matter: Textile printing processes (relief process, silk screen printing, intaglio, photography), screen printing methods (silk screen, paper cut, pro-film), sample illustration of screen printing.
Specific Objectives
By the end of the lesson, pupils should be able to:
Cognitive Domain:
- Define textile printing and list various textile printing processes.
- Describe different methods of screen printing, including silk screen, paper cut, and pro-film.
Affective Domain:
- Appreciate the aesthetic value and creative possibilities in textile design.
- Value the importance of different printing techniques in art and industry.
Psychomotor Domain:
- Identify the basic materials and tools used in screen printing.
- Create a simple stencil or pattern for printing.
Social Domain:
- Collaborate with peers in discussing and understanding art techniques.
Reference Materials
The following resources were used in planning this lesson:
- Senior Secondary Schools Education Curriculum
- State Unified Scheme of Work
- Creative and Cultural Arts for Senior Secondary Schools Book 2
Instructional Materials
The teacher will teach this lesson with the aid of:
- Screen frame
- Printing ink
- Squeegee
- Pro-film
- Paper cut stencil
- Sample prints of various textile designs
- Examples of printed fabrics
- Charts illustrating printing processes
Rationale for the Lesson
This lesson helps pupils understand how patterns are applied to fabrics using various techniques. It enables them to appreciate the art of textile design and encourages their creativity in designing and producing their own printed textiles, which can have practical applications.
Prerequisite/Previous Knowledge
Pupils should have basic knowledge of art and design principles, including patterns, colours, and textures, from previous lessons.
Lesson Content/Board Summary
TEXTILE DESIGN AND PRINTING PROCESS
Introduction to Textile Printing
Textile printing is the process of applying colour to fabric in specific patterns or designs. In properly printed fabrics, the colour is bonded with the fibre so that it resists washing and friction.
Textile Printing Processes
Different methods are used to transfer designs onto fabrics. Some common processes include:
- Relief Process: This involves carving a design into a material (e.g., wood, linoleum) so that the raised areas hold the ink and transfer the design to the fabric. Examples include woodcut and linocut.
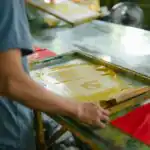
- Silk Screen Printing: A stencil is used to apply ink onto a substrate through a mesh screen. Areas not to be printed are blocked out.
- Intaglio: A printing technique where the image is incised into a surface, and the incised line or sunken area holds the ink. While more common for paper, variations can be adapted for textiles.
- Photography (Photo Emulsion Screen Printing): A photographic process used to create stencils on a screen by exposing a light-sensitive emulsion to light through a transparency, allowing for detailed designs.
Screen Printing Methods
Screen printing is a versatile method with several techniques for creating the stencil:
- Silk Screen Method (Photo Emulsion):
- A silk or synthetic mesh screen is coated with a light-sensitive emulsion.
- A transparency with the design is placed on the coated screen and exposed to UV light.
- The unexposed emulsion washes away, leaving the design open on the screen, ready for printing.
- Paper Cut Method:
- A design is cut out of paper or thin card to create a stencil.
- This paper stencil is then adhered to the underside of the screen.
- Ink is pushed through the open areas of the paper stencil onto the fabric. This method is suitable for simple, bold designs.
- Pro-Film Method (Rubylith/Amberlith):
- A two-layer film (e.g., Rubylith) consisting of a clear base and a coloured, peelable top layer is used.
- The design is cut into the top layer, and the unwanted areas are peeled away.
- The cut film is then attached to the screen, acting as a stencil. This method allows for precise, sharp-edged designs.
Sample Illustration of Screen Printing Process
The basic steps for screen printing generally involve:
- Screen Preparation: Cleaning and preparing the screen, then applying emulsion or attaching a stencil (paper cut or pro-film).
- Design Transfer: Creating the stencil on the screen (e.g., by exposing photo emulsion or attaching a cut stencil).
- Fabric Placement: Placing the fabric to be printed on a flat surface, securing it.
- Ink Application: Pouring printing ink onto one end of the screen.
- Squeegee Action: Using a squeegee to pull the ink evenly across the screen, forcing it through the open areas of the stencil onto the fabric.
- Drying: Carefully lifting the screen and allowing the printed fabric to dry.
- Curing/Fixing: Heat-setting the ink to ensure permanence.
Teaching Methods/Instructional Techniques
Discussion, Lecture, Demonstration, Question and Answer, Visual Aids
Instructional Procedures
Step 1: Introduction
Time: 5 minutes
Teaching Skill: Set Induction
Teacher’s Activity: The teacher greets the pupils and asks them to identify different patterns on their clothes, leading into a discussion about how these patterns are made.
Pupils’ Activity: Pupils respond to the questions and share their observations about patterns on fabrics.
Learning Point: Pupils are introduced to the concept of textile patterns and printing.
Step 2: Explanation of Textile Printing
Time: 7 minutes
Teaching Skill: Explanation/Definition
Teacher’s Activity: The teacher defines textile printing and explains its purpose, using examples of printed fabrics. The teacher also introduces various textile printing processes like relief, intaglio, and photography.
Pupils’ Activity: Pupils listen attentively, observe the examples, and ask questions for clarification.
Learning Point: Pupils understand the definition and purpose of textile printing and are aware of different printing processes.
Step 3: Discussion of Screen Printing Methods
Time: 10 minutes
Teaching Skill: Description/Elaboration
Teacher’s Activity: The teacher explains the three main methods of screen printing: silk screen (photo emulsion), paper cut, and pro-film, highlighting the characteristics and uses of each.
Pupils’ Activity: Pupils listen, take notes, and engage in a brief discussion on the differences between the methods.
Learning Point: Pupils learn about the various techniques for creating stencils in screen printing.
Step 4: Demonstration/Illustration of Screen Printing
Time: 10 minutes
Teaching Skill: Demonstration/Visualisation
Teacher’s Activity: The teacher uses the instructional materials (screen frame, squeegee, ink, stencils, sample prints) to illustrate the steps involved in a simple screen printing process, showing how a stencil transfers a design.
Pupils’ Activity: Pupils observe the demonstration carefully, paying attention to the materials and techniques used.
Learning Point: Pupils gain a visual understanding of the practical application of screen printing.
Step 5: Pupils’ Practical Engagement
Time: 5 minutes
Teaching Skill: Practical Application
Teacher’s Activity: The teacher guides pupils to handle the materials (e.g., a paper cut stencil, a small screen) and discuss how they could create a simple pattern or stencil for printing.
Pupils’ Activity: Pupils handle the materials, discuss ideas, and brainstorm simple stencil designs.
Learning Point: Pupils develop a hands-on understanding and creative thinking for stencil making.
Step 6: Evaluation/Review
Time: 5 minutes
Teaching Skill: Questioning/Assessment
Teacher’s Activity: The teacher evaluates the learning by asking the following questions:
- What is textile printing?
- Mention two textile printing processes.
- List three methods of screen printing.
- Describe briefly how a paper cut stencil is used in screen printing.
Pupils’ Activity: Pupils answer orally and in writing.
Learning Point: Pupils demonstrate understanding of the lesson.
Step 7: Conclusion
Time: 3 minutes
Teaching Skill: Summarisation
Teacher’s Activity: The teacher summarises the key points of the lesson, emphasizing the importance of textile printing in art and everyday life. The teacher then gives homework.
Pupils’ Activity: Pupils listen to the summary and copy down the homework.
Learning Point: Pupils consolidate their understanding and prepare for further study.
Lesson Keywords
- Textile Printing – The process of applying colour to fabric in specific patterns.
- Screen Printing – A printing technique where ink is forced through a mesh screen onto a substrate.
- Relief Process – Printing from a raised surface.
- Intaglio – Printing from an incised or sunken surface.
- Squeegee – A tool with a rubber blade used to force ink through a screen.
- Stencil – A thin sheet of material with a design cut out, used to reproduce the design.
- Pro-film – A specialized film used to create stencils for screen printing.
Differentiation
For visual learners, the teacher will use charts, diagrams, and actual samples of printed textiles and printing materials. Kinesthetic learners will benefit from handling the screen printing tools and attempting to create simple stencils. Advanced learners can research and present on advanced textile printing techniques, while struggling learners will receive additional support and simpler tasks like identifying materials or describing one printing method.
Note for teachers using this lesson plan
Teachers should ensure they have all necessary instructional materials for a clear demonstration. If a full practical demonstration is not feasible, detailed visual aids and videos can be used. Encourage pupils to think creatively about how they can apply these techniques to design their own fabrics. Emphasize safety precautions when handling inks and tools.
Community Join the conversation Open discussion +