

Class: Pre-School Level 4
Term: Third Term
Week: 6
Age: 5 years
Duration: 30 minutes
Subject: Numeracy
Curriculum Theme: Numeracy
Previous Lesson: Basic shapes and their properties
Topic: LENGTH: COMPARING AND MEASURING OBJECTS
Subject Matter: Length: Comparing and Measuring Objects
Specific Objectives
By the end of the lesson, pupils should be able to:
Cognitive Domain
- Identify a tape rule and a ruler.
- Mention what a tape rule and a ruler are used for.
- Compare the lengths of two objects using “longer than” and “shorter than”.
Affective Domain
- Show interest in measuring and comparing objects.
- Participate actively in classroom activities.
Psychomotor Domain
- Measure the length of short objects using a ruler or tape rule with guidance.
- Demonstrate how to compare the lengths of two objects.
Social Domain
- Work cooperatively with peers during group activities.
Reference Materials
- NAPPS National Unified Teaching Scheme for Pre-School Level 4
- Relevant Early Childhood Care and Education resources
- Early years Numeracy workbook
Instructional Materials
- Tape rule
- Ruler (30cm)
- Charts showing objects of different lengths
- Various short objects (pencils, erasers, crayons, sticks, books)
- Picture cards of long and short items
Rationale for the Lesson
Understanding length helps children describe and interact with the world around them. This lesson introduces practical tools for measurement and develops vocabulary for comparing sizes, which are essential skills for daily life and future mathematical concepts.
Prerequisite/Previous Knowledge
Pupils can identify and compare objects based on general size (big/small) and have some experience with sorting and classifying items.
Lesson Content/Board Summary
LENGTH: COMPARING AND MEASURING OBJECTS
Length tells us how long something is from one end to the other.
We use special tools to find out the length of things.
Measuring Tools
- Ruler: A flat, straight tool with numbers used to measure short objects like pencils, books, or papers.
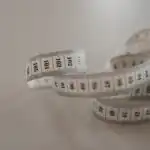
- Tape Rule: A flexible, long tape with numbers used to measure longer or curved objects, or distances.
How to Measure Short Objects (using a ruler)
- Place the object next to the ruler, making sure one end of the object lines up with the ‘0’ mark on the ruler.
- Look at the number where the other end of the object stops. That number tells you its length.
Comparing Lengths
When we compare two objects, we can say if one is longer than or shorter than the other.
- If an object goes further, it is longer than the other.
- If an object does not go as far, it is shorter than the other.
What the Teacher Should Show or Draw
- Display a ruler and a tape rule.
- Draw two lines, one clearly longer than the other.
- Demonstrate measuring a pencil with a ruler.
Length Comparison Rhyme
Tune: “Twinkle, Twinkle Little Star”
Ruler, ruler, straight and true,
Helps us measure, me and you.
Is it long or is it short?
Let’s compare, it’s lots of sport!
This one’s longer, that one’s less,
Measuring length, we do our best!
Actions:
- Point to a ruler when singing “Ruler, ruler”.
- Make a measuring motion with hands when singing “Helps us measure”.
- Stretch hands far apart for “long” and bring them close for “short”.
- Point to two objects to compare for “This one’s longer, that one’s less”.
How to use the rhyme: Sing the rhyme together after demonstrating how to compare lengths. Encourage pupils to do the actions as they sing.
Video Demonstration: Measuring Length
Watch this short video to see how to measure and compare lengths.
Key Words
- Length – how long something is.
- Ruler – a tool used to measure short objects.
- Tape rule – a flexible tool used to measure longer objects or distances.
- Longer than – describes an object that has more length.
- Shorter than – describes an object that has less length.
Teaching Methods/Instructional Techniques
Demonstration, Guided Practice, Play-based Learning, Songs and Rhymes, Picture Talk, Manipulation of Objects, Question and Answer, Repetition.
Instructional Procedures
Step 1: Introduction
Time: 3 minutes
Teaching Skill: Engagement/Recall
Teacher’s Activity: The teacher greets the pupils and asks them to look around the classroom and identify things that are long and things that are short (e.g., a long table, a short pencil). The teacher introduces the topic: “Today, we will learn about length and how to measure and compare things.”
Pupils’ Activity: Pupils greet the teacher and point out long and short objects in the classroom.
Learning Point: Pupils recall prior knowledge of size and are introduced to the concept of length.
Step 2: Introduction to Length
Time: 4 minutes
Teaching Skill: Explanation/Demonstration
Teacher’s Activity: The teacher explains what length means using simple language and shows examples of objects with different lengths (e.g., a long stick and a short stick). “Length tells us how long something is from one end to the other.”
Pupils’ Activity: Pupils listen and observe the objects, repeating the word “length”.
Learning Point: Pupils understand the basic concept of length.
Step 3: Introducing Measuring Tools
Time: 5 minutes
Teaching Skill: Identification/Naming
Teacher’s Activity: The teacher displays a ruler and a tape rule. “These are tools we use to measure length.” The teacher names each tool and explains its use. “This is a ruler, we use it for short things. This is a tape rule, we use it for longer things or around corners.” The teacher asks pupils to identify and name them.
Pupils’ Activity: Pupils identify the ruler and tape rule, repeat their names, and mention what they are used for.
Learning Point: Pupils identify and know the basic use of a ruler and tape rule.
Step 4: Demonstration of Measuring
Time: 5 minutes
Teaching Skill: Demonstration/Modelling
Teacher’s Activity: The teacher demonstrates how to measure a short object (e.g., a pencil) using a ruler. The teacher explains to place the object at the ‘0’ mark and read the number at the end. “See? This pencil is 10 centimetres long.”
Pupils’ Activity: Pupils watch carefully as the teacher demonstrates, paying attention to how the ruler is used.
Learning Point: Pupils observe the correct procedure for measuring short objects.
Step 5: Guided Practice – Measuring
Time: 5 minutes
Teaching Skill: Guided Practice/Application
Teacher’s Activity: The teacher gives each pupil or small groups a ruler and a short object (e.g., a crayon, an eraser). The teacher guides them step-by-step to measure their objects, offering assistance as needed. “Place your crayon at the zero mark. Now, what number does it stop at?”
Pupils’ Activity: Pupils practice measuring their assigned objects with the ruler under the teacher’s guidance.
Learning Point: Pupils gain hands-on experience in measuring short objects.
Step 6: Comparing Lengths
Time: 4 minutes
Teaching Skill: Comparison/Vocabulary
Teacher’s Activity: The teacher presents two objects of clearly different lengths (e.g., a long book and a short book). The teacher places them side-by-side and asks, “Which one is longer? Which one is shorter?” The teacher introduces and reinforces the terms “longer than” and “shorter than”. The class sings the “Length Comparison Rhyme”.
Pupils’ Activity: Pupils identify the longer and shorter objects and use the terms “longer than” and “shorter than” to describe them. Pupils sing the rhyme with actions.
Learning Point: Pupils learn to compare objects and use appropriate vocabulary.
Step 7: Evaluation/Review
Time: 4–5 minutes
Teaching Skill: Questioning/Assessment
Teacher’s Activity: The teacher checks pupils’ understanding through short questions and practical tasks.
- “What is this tool called?” (showing a ruler)
- “What do we use a ruler for?”
- (Teacher places two pencils of different lengths side-by-side) “Which pencil is longer?”
- (Teacher asks a pupil to measure a small object like a crayon.) “Show me how to measure this crayon.”
Pupils’ Activity: Pupils respond orally and demonstrate the required skill where appropriate.
Learning Point: Pupils demonstrate understanding of the lesson.
Step 8: Conclusion
Time: 1 minute
Teaching Skill: Summarization
Teacher’s Activity: The teacher summarises the lesson by reminding pupils that they learned about length, measuring tools (ruler, tape rule), and how to compare objects using “longer than” and “shorter than”. The teacher encourages them to look for long and short things at home.
Pupils’ Activity: Pupils listen and acknowledge the summary.
Learning Point: Pupils consolidate their learning.
Lesson Keywords
- Length – how long something is from one end to the other.
- Ruler – a straight tool with numbers used to measure short things.
- Tape rule – a flexible tool used to measure long or curved things.
- Longer than – means something has more length compared to another.
- Shorter than – means something has less length compared to another.
Differentiation
- Support: For pupils who struggle, provide larger objects to measure and compare. Offer hand-over-hand guidance when using the ruler. Focus only on identifying “long” and “short” before introducing “longer than” and “shorter than”. Use fewer comparison options.
- Extension: Encourage pupils who grasp the concept quickly to measure more objects and record their approximate lengths. Ask them to find three objects in the classroom and arrange them from shortest to longest.
Note for teachers using this lesson plan
Before the lesson, ensure you have a variety of real objects of different lengths readily available for demonstration and pupil practice. Prepare enough rulers for small groups or individual use. Emphasize the ‘0’ mark when teaching measurement. For comparing lengths, physically place objects side-by-side. Encourage pupils to use the target vocabulary (“longer than,” “shorter than”) repeatedly. Observe pupils’ ability to align objects with the ruler and to correctly identify comparative lengths. Practical demonstration and hands-on activity are crucial for this age group to grasp the concept of length and measurement.
Community Join the conversation Open discussion +