

Note for teachers using this lesson plan
Before this lesson, ensure all digital devices and keyboards are readily available and in good working condition for pupils to use. The central concept is to help pupils understand what a keyboard is, classify its keys, and perform basic operations. By the end of the lesson, pupils should be able to identify different key types and confidently use them for simple typing and navigation tasks.
Class: Primary 4
Term: First Term
Week: 6
Age: 9 years
Duration: 45 minutes
Subject: Basic Digital Literacy
Curriculum Theme: Basics of Computing
Focal competence: Using keyboard and mouse to perform basic input operations
Key competencies/values: ICT and Digital Competencies; Information Literacy
Skills:
- Using keyboard to perform basic operations
Previous Lesson: Peripheral Devices, Input and Output Types, Functions and Uses
Topic: Input Devices: Keyboard
Subject Matter: Meaning of keyboard, classification of keyboard keys, basic keyboard operations
Specific Objectives
By the end of the lesson, pupils should be able to:
Cognitive Domain
- Explain the meaning of a keyboard.
- Identify the main classifications of keys on a keyboard.
Affective Domain
- Appreciate the importance of the keyboard as an input device.
Psychomotor Domain
- Use the keyboard to type letters, numbers, symbols, and punctuation.
- Use navigation, modifier, function, and special keys in simple operations.
Reference Materials
The following resources were used in planning this lesson:
- 2025 Revised 9 Years Basic Education Curriculum
- Relevant State Unified Scheme of Work
- Basic Digital Literacy for Primary 4 Textbook
- The HeadTeacher Scheme of work
Instructional Materials
The teacher will teach this lesson with the aid of:
- Digital devices (computers, laptops)
- Keyboards (physical or on-screen)
- Mavis Beacon (typing tutor software, if available)
- Charts showing different keyboard layouts
Rationale for the Lesson
This lesson is important as it introduces pupils to one of the most fundamental input devices of a computer – the keyboard. Understanding the keyboard’s meaning, key classifications, and basic operations is crucial for developing foundational digital literacy skills. This knowledge enables pupils to interact effectively with computers for typing, navigation, and various other tasks.
Prerequisite/Previous Knowledge
Pupils should have a basic understanding of what an input device is and some common computer parts.
Lesson Content/Board Summary
Input Devices: Keyboard
Meaning of a Keyboard
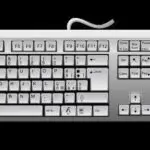
A keyboard is an input device that allows you to enter letters, numbers, symbols, and commands into a computer. It is like a typewriter for computers, helping us to communicate with the machine.
Classification of Keyboard Keys
Keys on a keyboard are grouped into different classifications based on their functions. The main classifications include:
- Alphanumeric Keys: These are the most common keys and include letters (A-Z), numbers (0-9), and punctuation marks (e.g., ., ,, ?, !, @, #, $, %, ^, &, *, (, ), -, _, =, +). They are used for typing text and numbers.
- Numeric Keypad: This section, usually on the right side of the keyboard, contains numbers (0-9) and mathematical operators (+, -, *, /). It is used for quick entry of numerical data.
- Function Keys: These keys are labelled F1 to F12 and are located at the top of the keyboard. They perform special functions depending on the program or application being used (e.g., F1 often opens help).
- Navigation Keys: These keys help you move around documents or web pages. They include the Arrow keys (Up, Down, Left, Right), Home, End, Page Up, and Page Down.
- Modifier Keys: These keys are used in combination with other keys to perform specific actions. Examples include Shift, Ctrl (Control), and Alt (Alternate). For example, holding Shift while typing a letter makes it uppercase.
- Special Purpose Keys: These keys perform unique tasks. Examples include Enter (to confirm commands or start a new line), Backspace (to delete characters to the left), Delete (to delete characters to the right), Tab (to create indents or move between fields), Esc (Escape, to cancel an operation), and Print Screen.
Basic Keyboard Operations
Basic operations you can perform with a keyboard include:
- Typing Letters: Pressing individual letter keys to form words and sentences.
- Typing Numbers: Using the number keys above the alphanumeric keys or the numeric keypad to enter numerical data.
- Typing Symbols and Punctuation: Using keys like period (.), comma (,), question mark (?), exclamation mark (!), and other symbols (e.g., @, #, $). Some symbols require holding the Shift key.
- Using Navigation Keys: Employing the arrow keys to move the cursor up, down, left, or right within text or on the screen.
- Using Modifier Keys: Combining Shift with letters for capitalisation, or with numbers/symbols to access alternative characters on a key.
- Using Special Keys:
- Enter: To execute a command or move to the next line in a document.
- Backspace: To erase characters one by one to the left of the cursor.
- Delete: To erase characters one by one to the right of the cursor or selected items.
- Using Function Keys: Pressing F1-F12 keys to activate specific program functions.
Teaching Methods/Instructional Techniques
Discussion, Demonstration, Guided Practice, Question and Answer, Explanation, Observation, Practical Activity
Instructional Procedures
Step 1: Introduction
Time: 5 minutes
Teaching Skill: Questioning/Activating prior knowledge
Teacher’s Activity: The teacher greets the pupils and asks them to name some parts of a computer they know. The teacher then specifically asks about devices used to put information into the computer, leading them to mention the keyboard.
Pupils’ Activity: Pupils respond by naming computer parts and input devices.
Learning Point: Input device recall
Step 2: Meaning of Keyboard
Time: 7 minutes
Teaching Skill: Explanation/Demonstration
Teacher’s Activity: The teacher displays a keyboard and explains its meaning as an input device for typing letters, numbers, and symbols into a computer. The teacher demonstrates how it connects to a computer.
Pupils’ Activity: Pupils observe the keyboard and listen to the explanation.
Learning Point: Keyboard meaning
Step 3: Key Classification Introduction
Time: 8 minutes
Teaching Skill: Explanation/Categorisation
Teacher’s Activity: The teacher introduces the idea that keys on a keyboard are grouped by what they do. The teacher points to different sections of the keyboard and names the main classifications: Alphanumeric, Numeric Keypad, Function, Navigation, Modifier, and Special Purpose keys.
Pupils’ Activity: Pupils listen and identify the different sections on the displayed keyboard or their own.
Learning Point: Key classification types
Step 4: Alphanumeric and Numeric Key Operations
Time: 6 minutes
Teaching Skill: Demonstration/Guided Practice
Teacher’s Activity: The teacher demonstrates typing letters, numbers, and basic punctuation marks using the alphanumeric keys. The teacher then guides pupils to type their names and ages using these keys on their own keyboards or on-screen keyboards.
Pupils’ Activity: Pupils practice typing letters, numbers, and basic punctuation.
Learning Point: Typing letters and numbers
Step 5: Navigation and Special Keys Operations
Time: 6 minutes
Teaching Skill: Demonstration/Guided Practice
Teacher’s Activity: The teacher demonstrates the use of arrow keys to move the cursor. The teacher also shows how to use Enter (to start a new line) and Backspace (to delete characters) in a simple text editor. Pupils then practice these operations.
Pupils’ Activity: Pupils practice using arrow keys, Enter, and Backspace.
Learning Point: Navigation and special keys
Step 6: Modifier and Function Keys Overview
Time: 4 minutes
Teaching Skill: Explanation/Observation
Teacher’s Activity: The teacher briefly explains the role of modifier keys like Shift (for capital letters/symbols) and Ctrl (used with other keys). The teacher also points out the function keys (F1-F12) and explains they have special uses in different programs.
Pupils’ Activity: Pupils observe the keys and listen to the explanations.
Learning Point: Modifier and function keys
Step 7: Evaluation/Review
Time: 5 minutes
Teaching Skill: Questioning/Assessment
Teacher’s Activity: The teacher evaluates the learning by asking the following questions:
- What is a keyboard?
- Name two classifications of keys on a keyboard.
- Which key would you use to type a capital letter?
- Which key helps you delete a mistake to the left of your cursor?
Pupils’ Activity: Pupils answer orally and in writing.
Learning Point: Keyboard knowledge assessment
Step 8: Note-Taking
Time: 4 minutes
Teaching Skill: Guided Writing
Teacher’s Activity: The teacher guides pupils to copy the essential Board Summary notes on keyboard meaning, key classifications, and basic operations into their notebooks.
Pupils’ Activity: Pupils copy the notes carefully into their notebooks.
Learning Point: Board summary recording
Step 9: Conclusion
Time: 2 minutes
Teaching Skill: Reinforcement
Teacher’s Activity: The teacher summarises the lesson by reminding pupils that the keyboard is a powerful tool for interacting with computers and mastering its use is a key digital skill. The teacher encourages them to practice typing.
Pupils’ Activity: Pupils listen and acknowledge the importance of the keyboard.
Learning Point: Keyboard importance reinforcement
Continuous Assessment/Further Study
Type: Homework/Practice Exercise
Instruction: Answer the following questions and practice typing at home if you have access to a computer.
- List three types of keys found on a keyboard and give one example for each.
- Write down what the Enter key is used for.
- Practice typing the sentence: “The quick brown fox jumps over the lazy dog.”
Lesson Keywords
- Keyboard – An input device used to enter data into a computer.
- Alphanumeric keys – Keys for letters, numbers, and symbols.
- Function keys – Keys (F1-F12) for special program functions.
- Navigation keys – Keys like arrows, Home, End for moving around.
- Modifier keys – Keys like Shift, Ctrl, Alt used with other keys.
- Enter key – Used to confirm commands or start a new line.
- Backspace key – Used to delete characters to the left.
Differentiation
For pupils who are struggling, the teacher will provide extra one-on-one guidance during the practical sessions, focusing on identifying and using alphanumeric and navigation keys first. For advanced learners, the teacher can challenge them to explore more complex key combinations (e.g., Ctrl+C for copy, Ctrl+V for paste) or introduce them to typing games for faster skill development.
Suggested Lesson Videos
Search on YouTube for: “Keyboard parts and functions for kids Primary 4”
Teacher Guide for Using This Lesson Plan
To effectively use this lesson plan, ensure you have enough working digital devices or at least one large display with a keyboard for demonstration. Begin by engaging pupils with questions about computer parts to link to their prior knowledge. During the demonstration phases (Steps 4, 5, 6), make sure every pupil gets a chance to locate and press the named keys, either on a physical keyboard or an on-screen one. Guide their practice carefully, correcting any errors immediately. Encourage active participation and observation. Pupils should copy the Board Summary notes in Step 8 after the main teaching and practical activities are completed. Regularly check for understanding throughout the lesson, especially during the practical activities, to address any misconceptions. For weaker learners, simplify tasks and provide more direct prompts. For faster learners, offer additional typing exercises or ask them to identify less common keys.



Community Join the conversation Open discussion +