

Class: Primary 6
Term: 3rd Term
Week: 5
Age: 11 years
Duration: 45 minutes
Subject: General Mathematics
Curriculum Theme: Geometry
Previous Lesson: Plane Figures, 2D Shapes, Triangles, Irregular Polygons and Properties.
Topic: ANGLES
Subject Matter: Identifying angles in everyday objects, types of angles and angle symbols, measuring angles using a protractor, determining angle sizes in given shapes, measuring angles on a straight line and finding sums to 180 degrees
Specific Objectives
By the end of the lesson, pupils should be able to:
Cognitive Domain:
- Describe where angles are formed using everyday examples.
- Mention different types of angles and identify their symbols.
- Determine angle sizes in given simple shapes.
- Solve problems involving angles on a straight line.
Affective Domain:
- Appreciate the presence and importance of angles in their daily environment.
- Show confidence in identifying and measuring different types of angles.
Psychomotor Domain:
- Accurately use a protractor and ruler to measure given angles.
- Draw different types of angles.
Social Domain:
- Work cooperatively with peers when identifying and measuring angles.
Reference Materials
The following resources were used in planning this lesson:
- 9 Years Basic Education Curriculum (Primary 6 Mathematics)
- State Unified Scheme of Work (Primary 6 Mathematics)
- Understanding Mathematics for Primary Schools, Primary 6
- Textbook
- Workbook
- Formula book
- Charts
Instructional Materials
The teacher will teach this lesson with the aid of:
- Protractor
- Ruler
- Charts showing different types of angles
- Diagrams of shapes with angles
- Whiteboard/blackboard
- Markers/chalk
- Everyday objects like a door, clock, book
Rationale for the Lesson
This lesson helps pupils understand a fundamental concept in geometry, which is useful for understanding shapes and structures around them. Knowing about angles enables pupils to measure and solve real-world problems involving directions, construction, and design.
Prerequisite/Previous Knowledge
Pupils are expected to have a basic understanding of lines, points, and simple plane shapes.
Lesson Content/Board Summary
ANGLES
1. Identifying Angles in Everyday Objects
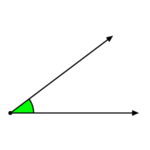
An angle is formed when two lines or rays meet at a common point called a vertex. Angles are found all around us.
The following are examples of where angles are formed in everyday objects:
- The corner of a room or a book.
- The hands of a clock.
- The opening of a door.
- The blades of a pair of scissors.
2. Types of Angles and Angle Symbols
Angles are classified based on their measurements. The symbol for an angle is ∠.
The common types of angles are:
- Acute Angle: An angle that measures less than 90°.
- Right Angle: An angle that measures exactly 90°. It is often marked with a square symbol.
- Obtuse Angle: An angle that measures greater than 90° but less than 180°.
- Straight Angle: An angle that measures exactly 180°. It forms a straight line.
- Reflex Angle: An angle that measures greater than 180° but less than 360°.
- Full Rotation/Revolution: An angle that measures exactly 360°. It forms a complete circle.
3. Measuring Angles Using a Protractor
A protractor is a mathematical instrument used to measure angles in degrees (°).
Steps to measure an angle using a protractor:
- Step 1: Place the center point of the protractor exactly on the vertex of the angle.
- Step 2: Align one arm of the angle with the 0° mark on the protractor’s scale (either inner or outer scale).
- Step 3: Read the measurement where the other arm of the angle crosses the same scale.
Example: Measure the angle shown in a diagram (teacher to draw an example angle on the board, e.g., 60°).
Note: Protractors have two scales. Always use the scale that starts from 0° on the aligned arm.
4. Determining Angle Sizes in Given Shapes
The sum of angles in different shapes are fixed:
- The sum of angles in a triangle is always 180°.
- The sum of angles in a quadrilateral (four-sided shape) is always 360°.
Example 1: Find the unknown angle ‘x’ in a triangle with angles 70° and 60°.
Solution:
Sum of angles in a triangle = 180°
x + 70° + 60° = 180°
x + 130° = 180°
x = 180° – 130°
x = 50°
Example 2: A quadrilateral has three angles measuring 80°, 100°, and 95°. Find the fourth angle ‘y’.
Solution:
Sum of angles in a quadrilateral = 360°
y + 80° + 100° + 95° = 360°
y + 275° = 360°
y = 360° – 275°
y = 85°
5. Angles on a Straight Line and Sums to 180 Degrees
Angles on a straight line always add up to 180°.
Example 1: Find the value of ‘a’ if 65° and ‘a’ are angles on a straight line.
Solution:
Angles on a straight line sum to 180°
a + 65° = 180°
a = 180° – 65°
a = 115°
Example 2: Three angles on a straight line are 40°, 75°, and ‘b’. Find ‘b’.
Solution:
Angles on a straight line sum to 180°
b + 40° + 75° = 180°
b + 115° = 180°
b = 180° – 115°
b = 65°
How to solve for an unknown angle on a straight line:
To find an unknown angle, subtract the sum of the known angles from 180°.
Teaching Methods/Instructional Techniques
Discussion, Lecture, Demonstration, Question and Answer, Visual Aids
Instructional Procedures
Step 1: Introduction
Time: 5 minutes
Teaching Skill: Set Induction
Teacher’s Activity: The teacher greets the pupils and asks them to look around the classroom and identify any corners or joints they see (e.g., corners of the board, tables, door frames). The teacher then asks what these corners represent mathematically.
Pupils’ Activity: Pupils respond by pointing out corners and may suggest they are angles.
Learning Point: Pupils are introduced to the concept of angles in their environment.
Step 2: Identifying Angles in Everyday Objects
Time: 7 minutes
Teaching Skill: Explanation/Demonstration
Teacher’s Activity: The teacher formally defines an angle and uses everyday objects like a door, a clock, and a book to demonstrate how angles are formed. The teacher draws examples on the board.
Pupils’ Activity: Pupils observe the demonstrations and give other examples of angles they see in their daily lives.
Learning Point: Pupils understand what an angle is and can identify angles in common objects.
Step 3: Types of Angles and Angle Symbols
Time: 8 minutes
Teaching Skill: Elucidation/Classification
Teacher’s Activity: The teacher introduces and explains the different types of angles (acute, right, obtuse, straight, reflex, full rotation) using charts and drawing examples on the board. The teacher also introduces the angle symbol (∠) and the right angle symbol.
Pupils’ Activity: Pupils listen, take notes, and identify the types of angles drawn by the teacher.
Learning Point: Pupils can differentiate between various types of angles and recognize their symbols.
Step 4: Measuring Angles Using a Protractor
Time: 7 minutes
Teaching Skill: Demonstration/Practical Application
Teacher’s Activity: The teacher demonstrates how to correctly use a protractor to measure different types of angles, emphasizing the correct placement of the vertex and alignment with the 0° mark. The teacher measures a few examples on the board.
Pupils’ Activity: Pupils observe carefully and practice measuring angles on their workbooks or given diagrams using their own protractors.
Learning Point: Pupils learn the practical skill of measuring angles accurately with a protractor.
Step 5: Determining Angle Sizes in Given Shapes
Time: 7 minutes
Teaching Skill: Problem Solving/Application
Teacher’s Activity: The teacher explains that the sum of angles in a triangle is 180° and in a quadrilateral is 360°. The teacher presents example problems on the board and guides pupils through solving for unknown angles in these shapes.
Pupils’ Activity: Pupils follow the examples, ask questions, and solve similar problems in their notebooks.
Learning Point: Pupils can calculate unknown angles within triangles and quadrilaterals.
Step 6: Angles on a Straight Line
Time: 6 minutes
Teaching Skill: Explanation/Calculation
Teacher’s Activity: The teacher explains that angles on a straight line add up to 180°. The teacher draws examples on the board with one or more unknown angles and guides pupils on how to solve for them.
Pupils’ Activity: Pupils follow the teacher’s examples and practice solving for unknown angles on a straight line.
Learning Point: Pupils understand that angles on a straight line sum to 180° and can solve related problems.
Step 7: Evaluation/Review
Time: 5 minutes
Teaching Skill: Questioning/Assessment
Teacher’s Activity: The teacher evaluates the learning by asking the following questions:
- Define an angle.
- Mention three types of angles.
- What is the sum of angles on a straight line?
- If two angles on a straight line are 50° and ‘x’, what is the value of ‘x’?
Pupils’ Activity: Pupils answer orally and in writing.
Learning Point: Pupils demonstrate understanding of the lesson.
Step 8: Conclusion
Time: 3 minutes
Teaching Skill: Summarization
Teacher’s Activity: The teacher summarizes the key points of the lesson, reiterating the definition of an angle, its types, how to measure them, and how to find unknown angles in shapes and on straight lines. The teacher assigns homework involving measuring angles and solving simple angle problems.
Pupils’ Activity: Pupils listen to the summary and copy down the assigned homework.
Learning Point: Pupils consolidate their understanding and are given tasks to reinforce learning.
Home Task: Solve three new exercises on ANGLES. Show each step and check each answer.
Lesson Keywords
- Angle – A figure formed by two rays sharing a common endpoint.
- Protractor – An instrument used for measuring angles.
- Acute – An angle less than 90°.
- Right – An angle exactly 90°.
- Obtuse – An angle between 90° and 180°.
- Straight – An angle exactly 180°, forming a straight line.
- Reflex – An angle greater than 180° but less than 360°.
- Revolution – A full turn, an angle of 360°.
Differentiation
For struggling learners, the teacher will provide pre-drawn angles to measure and offer more one-on-one guidance during practical measuring sessions. Advanced learners will be given more complex problems involving multiple unknown angles in shapes or real-world scenarios to solve independently.
Note for teachers using this lesson plan
Ensure that all pupils have access to a protractor and understand how to use it correctly. Practical demonstration and hands-on activities are important for this topic. Encourage pupils to look for angles in their environment and discuss their observations.
Community Join the conversation Open discussion +