

Class: Senior Secondary School 1 (SS1 / SSS 1)
Term: 1st Term
Week: 8
Age: 15 years
Duration: 45 minutes
Subject: Furniture Making
Curriculum Theme: Trade
Previous Lesson: Workshop Bench And Appliances: Meaning And Uses Of The Workbench.
Topic: Workshop Bench And Appliances
Subject Matter: Uses of the workbench, Workbench appliances, Tool placement on bench
Specific Objectives
By the end of the lesson, pupils should be able to:
Cognitive Domain:
- Define a workbench and state at least three of its uses.
- List at least four workbench appliances.
- Explain the importance of proper tool placement on a workbench.
Affective Domain:
- Appreciate the importance of a well-organized workbench for safety and efficiency.
- Develop an interest in maintaining a tidy and functional workshop environment.
Psychomotor Domain:
- Identify common workbench appliances such as the bench vice and bench hook.
- Demonstrate how to place tools correctly on a workbench.
Social Domain:
- Communicate effectively about safety practices related to workbench use.
- Collaborate with peers in identifying and discussing workbench components.
Reference Materials
The following resources were used in planning this lesson:
- Senior Secondary Education Curriculum for Trade Subjects.
- State Unified Scheme of Work for Furniture Making SS1.
- Adamu, I. A. (2015). Introductory Technology for Senior Secondary Schools, Book 1. Learn Africa Plc.
Instructional Materials
The teacher will teach this lesson with the aid of:
- An actual workbench.
- Examples of workbench appliances: bench hook, bench vice, G-clamp.
- Pictures or diagrams of various workbenches and their appliances.
- Assorted hand tools for demonstration of placement.
Rationale for the Lesson
This lesson helps pupils understand the basic structure and accessories of a workshop bench, which is essential for carrying out practical tasks safely and effectively. Knowing how to use and maintain a workbench properly ensures efficiency and reduces the risk of accidents in the workshop.
Prerequisite/Previous Knowledge
Pupils are expected to have basic knowledge of common workshop hand tools and general workshop safety rules.
Lesson Content/Board Summary
Workshop Bench And Appliances
The Workbench
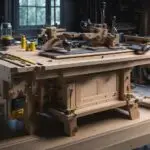
A workbench is a sturdy, heavy table specifically designed for manual work in a workshop. It provides a stable and secure surface for various tasks.
The following are uses of the workbench:
- It provides a firm and stable surface for working.
- It holds workpieces securely using various appliances.
- It supports tools and materials during work.
- It helps in marking out, cutting, and assembling workpieces.
- It protects other surfaces from damage during workshop operations.
Workbench Appliances
Workbench appliances are devices attached to or used with a workbench to assist in holding, clamping, or supporting workpieces.
The following are common workbench appliances:
- Bench Vice: A mechanical device with two jaws (one fixed, one movable) used for holding workpieces firmly in place while they are being worked on.
- Bench Hook: A wooden device with two cleats used to support small pieces of wood while sawing across the grain, protecting the workbench surface.
- G-Clamp: A portable C-shaped clamp used to hold workpieces together or to secure them to the workbench.
- Holdfast: A metal device inserted into a hole in the bench to clamp workpieces flat against the bench surface.
- Bench Stop: A metal or wooden peg inserted into the workbench to prevent workpieces from sliding during planing or chiselling.
Tool Placement on Workbench
Proper placement of tools on a workbench is important for safety, efficiency, and the longevity of the tools.
The following are rules for tool placement on a workbench:
- Keep the workbench tidy and free from unnecessary clutter.
- Place frequently used tools within easy reach.
- Arrange tools neatly, avoiding scattering them haphazardly.
- Ensure sharp edges and points of tools face away from the user or are covered.
- Avoid placing tools where they can easily fall off the bench.
- Return tools to their designated storage areas after use.
Teaching Methods/Instructional Techniques
Discussion, Lecture, Demonstration, Question and Answer, Visual Aids
Instructional Procedures
Step 1: Introduction
Time: 3 minutes
Teaching Skill: Set Induction
Teacher’s Activity: The teacher greets the pupils, reviews the previous lesson briefly, and then introduces the topic “Workshop Bench And Appliances” by asking pupils about the importance of a table in everyday life.
Pupils’ Activity: Pupils respond to the teacher’s questions and listen attentively.
Learning Point: Pupils’ interest in the lesson is aroused.
Step 2: Presentation of Workbench
Time: 7 minutes
Teaching Skill: Explanation/Discussion
Teacher’s Activity: The teacher defines what a workbench is and explains its various uses, writing key points on the board. The teacher uses the actual workbench in the workshop for illustration.
Pupils’ Activity: Pupils listen, take notes, and ask questions for clarification.
Learning Point: Pupils understand the definition and functions of a workbench.
Step 3: Identification of Workbench Appliances
Time: 8 minutes
Teaching Skill: Identification/Demonstration
Teacher’s Activity: The teacher introduces various workbench appliances (e.g., bench vice, bench hook, G-clamp) using actual examples or diagrams. The teacher explains the specific function of each appliance.
Pupils’ Activity: Pupils observe the appliances, identify them, and note their names and uses.
Learning Point: Pupils can identify and state the function of common workbench appliances.
Step 4: Practical Demonstration/Discussion of Appliances
Time: 8 minutes
Teaching Skill: Demonstration/Practical Application
Teacher’s Activity: The teacher demonstrates how to properly use the bench vice to hold a workpiece and how to position a bench hook for sawing. The teacher also shows how to use a G-clamp.
Pupils’ Activity: Pupils observe the demonstrations and may be asked to practice simple actions under supervision.
Learning Point: Pupils gain practical understanding of how to use workbench appliances.
Step 5: Discussion on Tool Placement
Time: 7 minutes
Teaching Skill: Explanation/Safety Education
Teacher’s Activity: The teacher discusses the importance of proper tool placement on the workbench, emphasizing safety and efficiency. The teacher lists and explains the rules for arranging tools.
Pupils’ Activity: Pupils listen, contribute to the discussion, and note down the rules for tool placement.
Learning Point: Pupils understand the rules and importance of correct tool arrangement.
Step 6: Class Activity/Practice
Time: 5 minutes
Teaching Skill: Guided Practice
Teacher’s Activity: The teacher provides a few hand tools and asks selected pupils to demonstrate proper tool placement on the workbench, guided by the rules discussed. Other pupils observe and provide feedback.
Pupils’ Activity: Selected pupils demonstrate tool placement; others observe and give constructive comments.
Learning Point: Pupils apply the knowledge of tool placement practically.
Step 7: Evaluation/Review
Time: 5 minutes
Teaching Skill: Questioning/Assessment
Teacher’s Activity: The teacher evaluates the learning by asking the following questions:
- Define a workbench.
- State three uses of a workbench.
- List four common workbench appliances.
- Explain why proper tool placement on a workbench is important.
Pupils’ Activity: Pupils answer orally and in writing.
Learning Point: Pupils demonstrate understanding of the lesson.
Step 8: Conclusion
Time: 2 minutes
Teaching Skill: Summarization
Teacher’s Activity: The teacher summarizes the key points of the lesson, reiterating the importance of the workbench, its appliances, and proper tool handling. The teacher assigns homework: “Draw and label two workbench appliances.”
Pupils’ Activity: Pupils listen to the summary and copy the homework.
Learning Point: The lesson is reinforced, and pupils are given an assignment.
Lesson Keywords
- Workbench – A sturdy, heavy table used in workshops for manual work.
- Vice – A mechanical device with jaws for holding workpieces firmly.
- Bench hook – A wooden device used to support small pieces of wood for sawing.
- G-clamp – A portable C-shaped clamp used to hold workpieces together or to a surface.
Differentiation
For pupils who are visual learners, the teacher will use actual workbenches, appliances, and diagrams. Kinesthetic learners will benefit from the practical demonstrations and opportunities to handle the tools and appliances. Auditory learners will engage through discussions and explanations. Peer learning will be encouraged where pupils help each other identify and understand the uses of different components.
Note for teachers using this lesson plan
Ensure that the workshop is clean and safe before the lesson. Emphasize safety precautions when demonstrating the use of appliances. Allow pupils supervised practical interaction with the workbench and its appliances where possible, to enhance their understanding and skill development.



Community Join the conversation Open discussion +