

Class: Senior Secondary School 1 (SS1 / SSS 1)
Term: 1st Term
Week: 7
Age: 15 years
Duration: 45 minutes
Subject: Furniture Making
Curriculum Theme: Trade
Previous Lesson: Hand Tools Safety: Demonstrating Safe Tool Usage Techniques.
Topic: Workshop Bench And Appliances
Subject Matter: Meaning of the workbench, Uses of the workbench, Workbench parts identification
Specific Objectives
By the end of the lesson, pupils should be able to:
Cognitive Domain:
- Define a workshop workbench.
- State at least three uses of a workbench.
- Identify and name at least four parts of a workbench.
Affective Domain:
- Appreciate the importance of a workbench in furniture making.
- Show interest in the proper handling and maintenance of workshop benches.
Psychomotor Domain:
- Sketch and label a simple workbench with its main parts.
- Demonstrate how to use a bench vice effectively.
Social Domain:
- Collaborate with peers to discuss and identify workbench features.
Reference Materials
The following resources were used in planning this lesson:
- 9 Years Basic Education Curriculum for Basic Technology (JSS 1-3) / Senior Secondary Education Curriculum for Trade and Entrepreneurship.
- State Unified Scheme of Work for Furniture Making SS1.
- Basic Technology for Senior Secondary Schools, Book 1.
Instructional Materials
The teacher will teach this lesson with the aid of:
- A wooden workbench
- A bench vice
- Measuring tape
- Diagrams or charts of a workbench
Rationale for the Lesson
This lesson helps pupils understand the fundamental equipment used in furniture making. Knowing the workbench and its parts enables them to work safely and efficiently, which is essential for developing practical skills in the workshop.
Prerequisite/Previous Knowledge
Pupils should have basic knowledge of workshop safety rules and an understanding of common hand tools used in woodworking.
Lesson Content/Board Summary
Workshop Bench And Appliances
Meaning of the Workbench
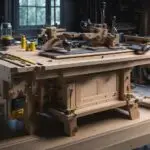
A workbench is a sturdy, heavy table specifically designed for manual work or assembly of items. It provides a stable and secure surface for various workshop operations, especially in furniture making, and is usually made of strong materials like hardwood.
Uses of the Workbench
The following are uses of the workbench:
- It provides a stable surface for marking out, cutting, planing, and chiselling operations.
- It holds workpieces securely in place using vices, bench dogs, or clamps, allowing for safe and accurate work.
- It serves as a temporary storage area for tools during work, keeping them organised and within reach.
- It helps in assembling furniture components.
Parts Identification of the Workbench
A typical workshop workbench has several important parts that aid its function:
- Bench top: This is the main flat, sturdy surface where work is performed. It is usually made of thick, durable hardwood.
- Legs/Frame: These support the bench top and provide overall stability to the workbench.
- Bench vice: A clamping device attached to the side or front of the bench, used to hold workpieces firmly while working on them.
- Bench dogs: These are small, movable pegs inserted into holes (dog holes) on the bench top, often used in conjunction with a vice to hold long workpieces.
- Apron/Skirts: These are boards running along the edges of the bench top, often housing drawers or providing structural support and rigidity.
- Tool well: A recessed area on the bench top or at the back, used for temporary storage of small tools and parts during work.
- Tail vice: Similar to a bench vice but often located at the end of the workbench, it is typically used with bench dogs for clamping long pieces.
Teaching Methods/Instructional Techniques
Discussion, Lecture, Demonstration, Question and Answer, Visual Aids
Instructional Procedures
Step 1: Introduction
Time: 5 minutes
Teaching Skill: Set Induction
Teacher’s Activity: The teacher greets the pupils, reviews the previous lesson briefly, and asks pupils to name any large equipment they have seen or used in a woodworking workshop.
Pupils’ Activity: Pupils respond to questions and listen attentively.
Learning Point: Pupils recall prior knowledge and connect to the new topic.
Step 2: Presentation of Topic
Time: 5 minutes
Teaching Skill: Explanation/Introduction
Teacher’s Activity: The teacher introduces the topic “Workshop Bench And Appliances” and writes it on the board. The teacher also states the lesson objectives to the pupils.
Pupils’ Activity: Pupils listen attentively and copy the topic into their notebooks.
Learning Point: Pupils are aware of the lesson’s focus and what they are expected to learn.
Step 3: Meaning of the Workbench
Time: 8 minutes
Teaching Skill: Explanation/Demonstration
Teacher’s Activity: The teacher explains what a workbench is, emphasizing its sturdy nature and specific purpose in a workshop. The teacher shows the actual wooden workbench to the pupils.
Pupils’ Activity: Pupils listen, observe the workbench, and ask questions for clarity.
Learning Point: Pupils understand the definition and general purpose of a workbench.
Step 4: Uses of the Workbench
Time: 8 minutes
Teaching Skill: Discussion/Listing
Teacher’s Activity: The teacher discusses and lists the various uses of a workbench in furniture making, demonstrating with the actual bench where possible to illustrate how it aids different operations.
Pupils’ Activity: Pupils listen, take notes, and contribute examples of how a workbench is used in practical situations.
Learning Point: Pupils know the functions and importance of a workbench in the workshop.
Step 5: Parts Identification of the Workbench
Time: 9 minutes
Teaching Skill: Identification/Labelling
Teacher’s Activity: The teacher points to and names the different parts of the wooden workbench (e.g., bench top, legs, bench vice, dog holes, apron, tool well). The teacher explains the function of each part.
Pupils’ Activity: Pupils observe carefully, identify, and name the parts as pointed out by the teacher, and note their functions.
Learning Point: Pupils can identify and state the function of the main parts of a workbench.
Step 6: Practical Application/Sketching
Time: 5 minutes
Teaching Skill: Guidance/Demonstration
Teacher’s Activity: The teacher guides pupils on how to sketch a simple workbench and label its main parts in their notebooks. The teacher also demonstrates how to properly use the bench vice with a workpiece.
Pupils’ Activity: Pupils sketch and label a workbench in their notebooks. They observe the demonstration of the bench vice and its application.
Learning Point: Pupils develop psychomotor skills in sketching and understand the practical application of workbench components.
Step 7: Evaluation/Review
Time: 5 minutes
Teaching Skill: Questioning/Assessment
Teacher’s Activity: The teacher evaluates the learning by asking the following questions:
- Define a workshop workbench.
- Mention three uses of a workbench.
- List four main parts of a workbench.
- Explain the function of a bench vice.
Pupils’ Activity: Pupils answer orally and in writing.
Learning Point: Pupils demonstrate understanding of the lesson.
Step 8: Conclusion
Time: 2 minutes
Teaching Skill: Summarization
Teacher’s Activity: The teacher summarizes the key points of the lesson, reiterating the importance of the workbench in furniture making, and assigns homework (e.g., draw and label a workbench, research different types of bench vices).
Pupils’ Activity: Pupils listen, ask final questions, and copy the homework.
Learning Point: Consolidates learning and prepares pupils for future lessons.
Lesson Keywords
- Workbench – A sturdy, heavy table designed for manual work or assembly in a workshop.
- Bench vice – A mechanical clamping device attached to a workbench to hold workpieces firmly.
- Bench dogs – Small, movable pegs inserted into holes on a workbench to assist in holding workpieces.
- Apron – The wooden boards or frame running along the edges of a workbench, providing structural support.
- Tool well – A recessed area on the workbench used for temporary storage of tools and small parts.
Differentiation
The teacher will provide additional support for struggling pupils by re-explaining concepts and offering simplified diagrams. Advanced pupils will be encouraged to research different types of workbenches and their specialized uses.
Note for teachers using this lesson plan
Ensure a physical workbench is available for demonstration to make the lesson more practical and engaging. Emphasize safety precautions when discussing and demonstrating the use of the workbench and its appliances, especially the bench vice. Encourage pupils to sketch accurately and to understand the function of each part for practical application.



Community Join the conversation Open discussion +