

Note for teachers using this lesson plan
For this lesson, ensure you have a fully stocked first aid box, safety posters, and a fire extinguisher or sand bucket available for demonstration. The central concept is to equip learners with the knowledge and practical skills for providing immediate first aid in a garment workshop. Emphasize safety precautions throughout, especially during demonstrations, and ensure learners can explain safety tools, describe first aid for common accidents, and demonstrate basic first aid procedures by the end of the lesson.
Class: SS 1
Term: First Term
Week: 10
Age: 15 years
Duration: 60 minutes
Subject: Fashion Design and Garment Making
Curriculum Theme: Introduction to fashion designs and
Focal competence: Practice safety precautions in a garment workshop
Key competencies/values: Critical Thinking; Research and Problem Solving; Problem Solving
Skills:
- Application of first aid treatment to accident victim
Previous Lesson: Garment Workshop Safety Precautions and Safety Equipment
Topic: Safety Precautions In Garment Making: First Aid Treatment In Garment Making
Subject Matter: First aid treatment in garment making
Specific Objectives
By the end of the lesson, pupils/students should be able to:
Cognitive Domain
- Explain the use of safety tools and equipment in a garment workshop.
- Describe first aid treatment for electric shocks, cuts, sprains, and burns.
Affective Domain
- Appreciate the importance of safety precautions in a garment workshop.
- Respond calmly and effectively during an accident in the workshop.
Psychomotor Domain
- Demonstrate the application of first aid treatment on a volunteer/dummy for common garment workshop accidents.
Reference Materials
The following resources were used in planning this lesson:
- 2025 New Revised Senior Secondary Education Curriculum (SSEC)
- Relevant State Unified Scheme of Work
- A suitable Fashion Design and Garment Making textbook for SS 1
- The HeadTeacher Scheme of work For The New Revised Senior Secondary Education Curriculum (SSEC)
Instructional Materials
The teacher will teach this lesson with the aid of:
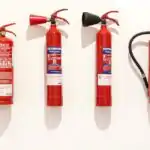
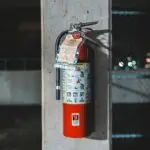
- Fire extinguisher
- Sand bucket
- Safety posters
- First aid box (containing bandages, antiseptic, plasters, scissors, gloves, etc.)
- Safety tools (e.g., thimbles, needle guards, machine guards)
- Dummy or volunteer for demonstration
- Internet-enabled device/projector for showing videos
Rationale for the Lesson
This lesson is essential for equipping students with critical safety knowledge and practical skills to prevent and respond to accidents in a garment workshop. Understanding first aid treatment ensures a safer working environment, reduces the severity of injuries, and builds confidence in handling emergencies, which is vital for any aspiring fashion designer or garment maker.
Prerequisite/Previous Knowledge
Pupils/students have a basic understanding of garment making tools and processes and are generally aware of common safety rules.
Lesson Content/Board Summary
Safety Precautions In Garment Making: First Aid Treatment In Garment Making
Meaning of First Aid
First aid refers to the immediate, temporary medical assistance given to an injured or sick person before professional medical help arrives. Its primary goals are to preserve life, prevent the condition from worsening, and promote recovery.
Importance of First Aid in Garment Making
First aid is crucial in garment making workshops because:
- It provides immediate care for common accidents like cuts from scissors, needle pricks, burns from irons, or electric shocks from machines.
- It helps prevent minor injuries from becoming severe or infected.
- It creates a safer working environment, reducing fear and anxiety among workers.
- It can save lives in critical situations before professional medical help is available.
- It promotes quick recovery, allowing individuals to return to work faster.
Safety Tools and Equipment in a Garment Workshop and Their Uses
- Fire Extinguisher: Used to put out small fires, especially those involving electrical equipment or fabric.
- Sand Bucket: Used to smother small fires, particularly those caused by flammable materials or electrical faults.
- First Aid Box: Contains essential medical supplies for treating minor injuries, such as bandages, antiseptic, plasters, scissors, and pain relievers.
- Safety Posters: Displayed to remind workers of safety rules, emergency procedures, and the location of safety equipment.
- Thimbles: Worn on the finger to protect it from needle pricks while hand sewing.
- Needle Guards: Attachments on sewing machines that prevent fingers from coming into contact with the needle during operation.
- Machine Guards: Protective covers on moving parts of sewing machines or other equipment to prevent accidental contact and injury.
- Proper Lighting: Ensures good visibility, reducing eye strain and the risk of accidents caused by poor visibility.
- Safety Goggles: Used when working with materials that might splinter or produce dust, protecting the eyes.
First Aid Treatment for Common Garment Workshop Accidents
Electric Shocks
Electric shocks can occur from faulty wiring or mishandling electrical equipment like sewing machines or irons.
- Safety First: Do NOT touch the victim while they are still in contact with the electrical source.
- Disconnect Power: Immediately switch off the main power supply or unplug the appliance. If this is not possible, use a non-conductive material (like a dry wooden stick or plastic broom handle) to push the victim away from the source.
- Assess Victim: Once safe, check if the victim is conscious and breathing.
- Call for Help: Dial emergency services if the victim is unconscious, not breathing, or severely injured.
- CPR (if necessary): If the victim is not breathing and you are trained, begin cardiopulmonary resuscitation (CPR).
- Treat Burns: If there are burns, treat them as described below.
- Keep Warm: Cover the victim with a blanket to prevent shock.
Cuts
Cuts are common from sharp tools like scissors, rotary cutters, or needles.
- Minor Cuts:
- Wash the cut gently with soap and clean water to remove dirt.
- Apply an antiseptic solution or cream.
- Cover the cut with a sterile plaster or bandage.
- Elevate the injured part if possible to reduce bleeding.
- Severe Cuts (Deep or Bleeding Heavily):
- Apply direct pressure to the wound with a clean cloth or sterile dressing to control bleeding.
- Elevate the injured limb above the heart if possible.
- Do NOT remove any embedded objects; apply pressure around them.
- Call for immediate medical help.
- Keep the victim calm and warm.
Sprains
Sprains can occur from twisting an ankle or wrist, often due to tripping over fabric or equipment.
- R.I.C.E. Method:
- Rest: Stop any activity that causes pain.
- Ice: Apply an ice pack (wrapped in a cloth) to the injured area for 15-20 minutes every 2-3 hours to reduce swelling and pain.
- Compression: Gently wrap the injured area with an elastic bandage to provide support and reduce swelling. Do not wrap too tightly.
- Elevation: Keep the injured limb raised above the level of the heart to help reduce swelling.
- Seek Medical Advice: If pain is severe, swelling is extensive, or the victim cannot bear weight, seek professional medical attention.
Burns
Burns can result from contact with hot irons, steam, or hot glue guns.
- First-Degree Burns (Redness, minor pain, no blisters):
- Cool the burn immediately with cool (not ice-cold) running water for at least 10-20 minutes.
- Do NOT apply ice, butter, oil, or any home remedies.
- Cover the burn with a clean, non-stick dressing or sterile bandage.
- Pain relievers like paracetamol can be given if needed.
- Second-Degree Burns (Redness, pain, blisters):
- Cool the burn with cool running water for 10-20 minutes.
- Do NOT break any blisters.
- Cover the burn loosely with a sterile, non-stick dressing.
- Elevate the burned area if possible.
- Seek medical attention, especially if the burn is larger than 3 inches or on a sensitive area (face, hands, feet, groin).
- Third-Degree Burns (Deep, white/charred appearance, nerve damage, less pain):
- Call for immediate emergency medical help.
- Do NOT remove clothing stuck to the burn.
- Do NOT apply water or any creams.
- Cover the burn loosely with a clean, dry, non-stick dressing or sheet.
- Keep the victim warm and calm until medical help arrives.
Teaching Methods/Instructional Techniques
Discussion, Demonstration, Guided Practice, Question and Answer, Explanation, Observation, Group Work, Practical Activity
Instructional Procedures
Step 1: Introduction
Time: 5 minutes
Teaching Skill: Engaging/Recalling
Teacher’s Activity: The teacher greets the students and reviews the previous lesson on general safety in the workshop. The teacher then introduces the topic “First Aid Treatment in Garment Making” by asking students what they would do if someone got a minor cut while sewing.
Pupils’ Activity: Pupils respond to greetings, recall previous knowledge, and share their initial thoughts on handling minor cuts.
Learning Point: Lesson introduction
Step 2: Meaning and Importance of First Aid
Time: 7 minutes
Teaching Skill: Explanation/Discussion
Teacher’s Activity: The teacher explains the meaning of first aid and discusses its critical importance specifically within a garment making workshop, highlighting how it saves lives and prevents complications.
Pupils’ Activity: Pupils listen attentively, ask questions for clarification, and contribute to the discussion on the importance of first aid.
Learning Point: First aid meaning and importance
Step 3: Safety Tools and Equipment
Time: 8 minutes
Teaching Skill: Demonstration/Identification
Teacher’s Activity: The teacher displays and explains the use of various safety tools and equipment found in a garment workshop, such as a fire extinguisher, sand bucket, first aid box, thimbles, and machine guards. The teacher may show safety posters.
Pupils’ Activity: Pupils observe the tools, identify them, and ask questions about their specific uses and locations in the workshop.
Learning Point: Safety tools and uses
Step 4: First Aid for Electric Shocks and Cuts
Time: 10 minutes
Teaching Skill: Demonstration/Guided Practice
Teacher’s Activity: The teacher explains and demonstrates the step-by-step first aid procedures for victims of electric shocks and cuts, using a dummy or volunteer for practical illustration. The teacher emphasizes safety precautions during an electric shock incident.
Pupils’ Activity: Pupils observe the demonstrations carefully, take notes, and may be guided to practice basic steps on a dummy or volunteer.
Learning Point: Electric shock and cut treatment
Step 5: First Aid for Sprains and Burns
Time: 10 minutes
Teaching Skill: Demonstration/Guided Practice
Teacher’s Activity: The teacher explains and demonstrates the first aid procedures for sprains (using the R.I.C.E. method) and different degrees of burns, emphasizing the immediate cooling of burns and the importance of not breaking blisters.
Pupils’ Activity: Pupils watch the demonstrations, ask questions, and practice the R.I.C.E. method and burn cooling techniques on a dummy or volunteer.
Learning Point: Sprain and burn treatment
Step 6: Group Brainstorming and Application
Time: 5 minutes
Teaching Skill: Group Work/Problem Solving
Teacher’s Activity: The teacher divides students into groups and guides them to brainstorm common causes of accidents in a garment workshop and discuss prevention strategies. Each group then briefly practices a specific first aid technique on a volunteer/dummy.
Pupils’ Activity: Pupils collaborate in groups, brainstorm causes and prevention, and actively participate in practicing first aid techniques.
Learning Point: Accident prevention and practice
Step 7: Evaluation/Review
Time: 5 minutes
Teaching Skill: Questioning/Assessment
Teacher’s Activity: The teacher evaluates the learning by asking the following questions:
- Mention three safety tools found in a garment workshop and their uses.
- Describe the first aid steps for a minor cut.
- What is the immediate action to take if someone gets an electric shock?
- Explain the R.I.C.E. method for treating a sprain.
Pupils’ Activity: Pupils answer orally and in writing.
Learning Point: Lesson comprehension
Step 8: Note-Taking
Time: 7 minutes
Teaching Skill: Guided Writing
Teacher’s Activity: The teacher guides pupils/students to copy the essential Board Summary notes on first aid treatment and safety tools into their notebooks.
Pupils’ Activity: Pupils/students copy the notes carefully into their notebooks.
Learning Point: Board summary notes
Step 9: Conclusion
Time: 3 minutes
Teaching Skill: Summarizing
Teacher’s Activity: The teacher briefly summarizes the key points of the lesson, emphasizing the importance of applying safety precautions and knowing first aid in the garment workshop. The teacher encourages students to be vigilant and responsible.
Pupils’ Activity: Pupils listen to the summary and ask any final questions.
Learning Point: Lesson summary
Continuous Assessment/Further Study
Type: Homework/Practice Exercise
Instruction: Answer the following questions and practice first aid techniques at home (under adult supervision if necessary).
- List five common accidents that can occur in a garment workshop.
- Explain the difference between a first-degree burn and a second-degree burn, and how you would provide first aid for each.
- Identify the contents of a typical first aid box and state the use of each item.
- Practice applying a bandage to a simulated cut on a family member or doll.
Lesson Keywords
- First aid – Immediate, temporary medical assistance given to an injured or sick person.
- Safety – Measures taken to protect against harm or danger.
- Garment making – The process of creating clothing and other textile products.
- Electric shock – Injury caused by contact with an electrical current.
- Cut – An opening in the skin caused by a sharp object.
- Sprain – An injury to a ligament caused by overstretching or tearing.
- Burn – Damage to tissue caused by heat, chemicals, electricity, or radiation.
- Fire extinguisher – A device used to put out small fires.
- Sand bucket – A container of sand used to smother small fires.
Differentiation
For students who grasp concepts quickly, encourage them to research advanced first aid techniques or create detailed safety posters for the workshop. For students needing more support, provide simplified step-by-step guides for first aid procedures and pair them with stronger students during practical demonstrations.
Suggested Lesson Videos
YouTube search: First aid treatment in garment making SS1
YouTube search: Safety precautions in sewing workshop

Community Join the conversation Open discussion +